The Hand-Drawn Flood Maps of Binghamton’s West Side: One Resident’s 15-Year Chronicle of Where Water Actually Goes

Frank Sobieski’s basement on Jarvis Street still carries a faint trace of the 2011 flood. Not mold, he’ll tell you—just the silt that worked into the joists and never fully left. He points to a waterline on the cinderblock, about knee-high, then to a spiral notebook on his workbench. “That’s where the official maps end,” he says. “This is where mine begin.”

For 15 years, Sobieski, a retired mechanical engineer who spent his career at a now-shuttered valve plant in Johnson City, has been mapping the West Side’s hidden flood patterns. Not with GIS software or lidar, but with a personal journal, hand-drawn maps on graph paper, and stories gathered from neighbors over coffee, at block parties, and during the anxious hours when the Susquehanna rises. His chronicle—a tattered three-ring binder stuffed with notes, photographs, and annotated photocopies of city plats—reveals where water actually goes when the storm drains back up, when the river overtops the flood wall, and when the buried streams that once drained the South Mountain slope reassert themselves through basement floors.

This is flood memory, a form of community science that Binghamton’s official models can’t replicate. FEMA’s flood insurance rate maps, last updated for Broome County in 2019, rely on broad hydrological modeling and historical crest data. They’re essential for setting insurance premiums and guiding development, but they don’t capture the block-by-block, house-by-house reality that Sobieski has documented: the way water pools behind the church on Leroy Street before it ever reaches the river gauge, or how the storm drain at the corner of Jarvis and Beethoven clogs with leaf litter every October, sending runoff into three adjacent basements in a predictable sequence. “The city’s model says this is a 100-year flood zone,” Sobieski says, tapping his map. “But my neighbors and I have lived through four floods in 15 years. The model doesn’t know about the clogged culvert under the rail trail.”

What the Official Maps Miss

Binghamton’s stormwater infrastructure is a palimpsest of 19th-century combined sewers, mid-20th-century flood walls, and piecemeal upgrades that never quite keep pace with the changing climate. The city’s 2024 comprehensive plan acknowledges that “localized flooding occurs outside mapped floodplains,” but the resources to systematically document those occurrences are thin. That’s where residents like Sobieski step in.

His maps don’t look like anything you’d see at a planning commission meeting. They’re drawn in colored pencil on sheets of graph paper, with blue arrows tracing surface flow paths, red Xs marking basement backups, and green hatch lines indicating yards that stay soggy for days after a heavy rain. Alongside the drawings are narrative entries: “March 14, 2019—Meltwater from the alley behind the old Polish National Alliance Hall ran down the driveway at 47 Jarvis and pooled against the foundation. Neighbor said it’s been happening since the city repaved the alley in ’07 and changed the grade.”

This kind of place-based storytelling is a legitimate planning tool, one that preserves the unique human perspectives that automated systems erase. As the Authors Guild notes in its AI Best Practices for Authors, maintaining human voices and the thinking that goes into writing is essential to preventing quality human documentation from becoming a rare luxury. Sobieski’s binder is exactly that: a human-authored record that no algorithm could generate, because it’s built on relationships, sensory detail, and the accumulated knowledge of people who have watched the water rise and recede for decades.

The Buried Streams of the West Side

One of Sobieski’s most striking discoveries is the network of buried streams that still influence drainage patterns on the West Side. Before Binghamton’s street grid was laid out in the early 1800s, several small tributaries ran from the South Mountain slope down toward the Chenango River. As the neighborhood developed, these streams were culverted, paved over, and eventually forgotten—except by the water itself.

“There’s a stream that used to run right under where Dickinson Street is now,” Sobieski says, flipping to a page in his binder that shows a dashed blue line running diagonally across several blocks. “You can’t see it, but during a heavy rain, the water still follows the old channel. It comes up through cracks in basement floors, it saturates the soil, and it finds the lowest point—which is usually someone’s living room.”

He’s documented this by correlating basement flooding reports from neighbors with historical maps he found in the Broome County Public Library’s local history collection. The 1876 atlas of Binghamton shows the stream clearly, meandering through what was then pastureland. By 1910, it had been buried. By 2011, it was flooding basements on a block that FEMA’s maps showed as safely outside the floodplain.

This is the kind of information that can’t be gleaned from a stormwater model. It requires someone to knock on doors, ask questions, and piece together a narrative from dozens of individual experiences. Sobieski has done exactly that, and his binder now contains flood histories for 47 properties on the West Side, each one a small story of water and memory.

How to Build Your Own Flood Chronicle

Sobieski’s work isn’t just a curiosity—it’s a model for how any neighborhood can build its own flood memory. The process doesn’t require technical training or expensive equipment. It requires observation, conversation, and a willingness to write things down.

Start with a notebook and a base map. You can print a simple street map from the county’s online GIS portal, or draw your own. Mark the locations of storm drains, downspouts, low spots in yards, and any place you’ve seen water pond after a rain. Then start talking to neighbors. Ask them: Where does water pool on your property? Have you ever had water in your basement? When? How high did it get? What happened just before the flooding—a heavy rain, a snowmelt, a clogged drain?

Record their answers in your journal, along with the date and the neighbor’s name (with permission). Over time, patterns will emerge. You might notice that three basements on the same block flood in sequence, or that a particular storm drain always backs up during leaf season. These patterns are the raw material of a flood chronicle.

Turning that raw material into a coherent, shareable record is a narrative craft. It’s not just about listing data points; it’s about weaving them into a story that makes sense to other residents, to city planners, and to emergency responders. The Purdue OWL’s Creative Writing Introduction offers resources on creative nonfiction that can help residents structure their observations into compelling chronicles—techniques like scene-setting, character development (the neighbor who’s lived on the block for 50 years), and narrative arc (the sequence of events leading up to a flood). Sobieski’s binder is full of these elements: the retired nurse on Beethoven Street who keeps a rowboat in her garage, the young family on Jarvis who installed a backup valve after the 2011 flood only to discover it couldn’t handle the pressure from the buried stream, the block captain who organizes a culvert-cleaning party every March.

For those who want to structure their chronicle more formally, thinking of it as a kind of a plot generator that fits the project can be useful. A plot generator, in the narrative sense, is a framework that helps you organize events into a meaningful sequence—identifying the inciting incident (the first basement flood), the rising action (the repeated storms, the failed interventions), the climax (the 2011 flood or a particularly devastating event), and the resolution (the backup valves, the rain gardens, the community agreements). Sobieski didn’t set out to write a plot, but his binder naturally follows this structure because floods, like stories, have a rhythm. They begin, they build, they crest, and they recede—and the aftermath is where the real work of resilience happens.

From Chronicle to Action

Sobieski’s maps have already influenced real-world decisions. In 2018, when the city was planning a street repaving project on Jarvis Street, he brought his binder to a public works meeting and showed the engineer how the proposed grade change would direct runoff into three basements that had previously stayed dry. The engineer adjusted the plan. “They wouldn’t have known otherwise,” Sobieski says. “The model didn’t show it. But my neighbors did.”

In 2022, a group of West Side residents used Sobieski’s documentation to successfully advocate for a rain garden installation at the low point of Beethoven Street, where stormwater had been pooling for years. The city’s stormwater utility fee funded the project, but the idea came from the binder—from the green hatch lines that showed where water lingered longest.

These are small victories, but they add up. And they point to a larger truth: what works on our block isn’t a miniature version of some national plan. It’s built on knowing which storm drain clogs first, which neighbor has a sump pump to share, and which basement still smells like the 2011 flood. Every block has a Frank Sobieski—or could have one. The question is whether we’re paying attention.

What You Can Do This Week

You don’t need to spend 15 years building a flood chronicle to make a difference. Start small. This week, take a walk around your block after the next heavy rain. Bring a notebook. Note where water ponds, where storm drains are clogged, and where runoff is flowing. Talk to one neighbor about their experience with flooding. Write down what they tell you.

If you want to go further, contact the Broome County Soil and Water Conservation District. They offer free site visits to help residents identify drainage issues and can connect you with resources for rain gardens, native plantings, and other green infrastructure. The district’s staff know the local hydrology better than almost anyone, and they’re eager to work with residents who have on-the-ground knowledge.

You can also attend a meeting of the Nanticoke Creek Watershed Coalition, which meets monthly at the Broome County Public Library. The coalition trains residents to spot pollution and flooding risks before they reach the Susquehanna, and they’re always looking for volunteers who know their own neighborhoods intimately.

Finally, consider starting your own block-level flood journal. It doesn’t need to be elaborate. A simple notebook, a pen, and a willingness to observe and listen are all you need. Over time, you’ll build something invaluable: a record of where water actually goes, written by the people who live with it.

Frank Sobieski’s binder sits on his workbench, next to a jar of pencils and an old radio tuned to the National Weather Service. He’s still adding to it, still knocking on doors, still tracing blue arrows across graph paper. “The river’s not done with us,” he says. “And I’m not done with the river.”


How We Built a Community Solar Project in Upstate New York (and How You Can Too)

I remember standing in a weedy lot on Binghamton’s south side, squinting at the sun, thinking: This could work. A few of us had been talking for months about whether our town could pull off a shared solar array. None of us were engineers. We were a retired accountant, a high school science teacher, a small-business owner, and me—just neighbors who wanted to do something practical about energy costs and the climate. That patch of unused land became the Southside Community Solar Garden. It took longer than we expected, cost more than we hoped, and taught us more than any workshop ever could. Here’s the real story, warts and all, plus a roadmap if you’re thinking about starting something similar in your corner of upstate New York.

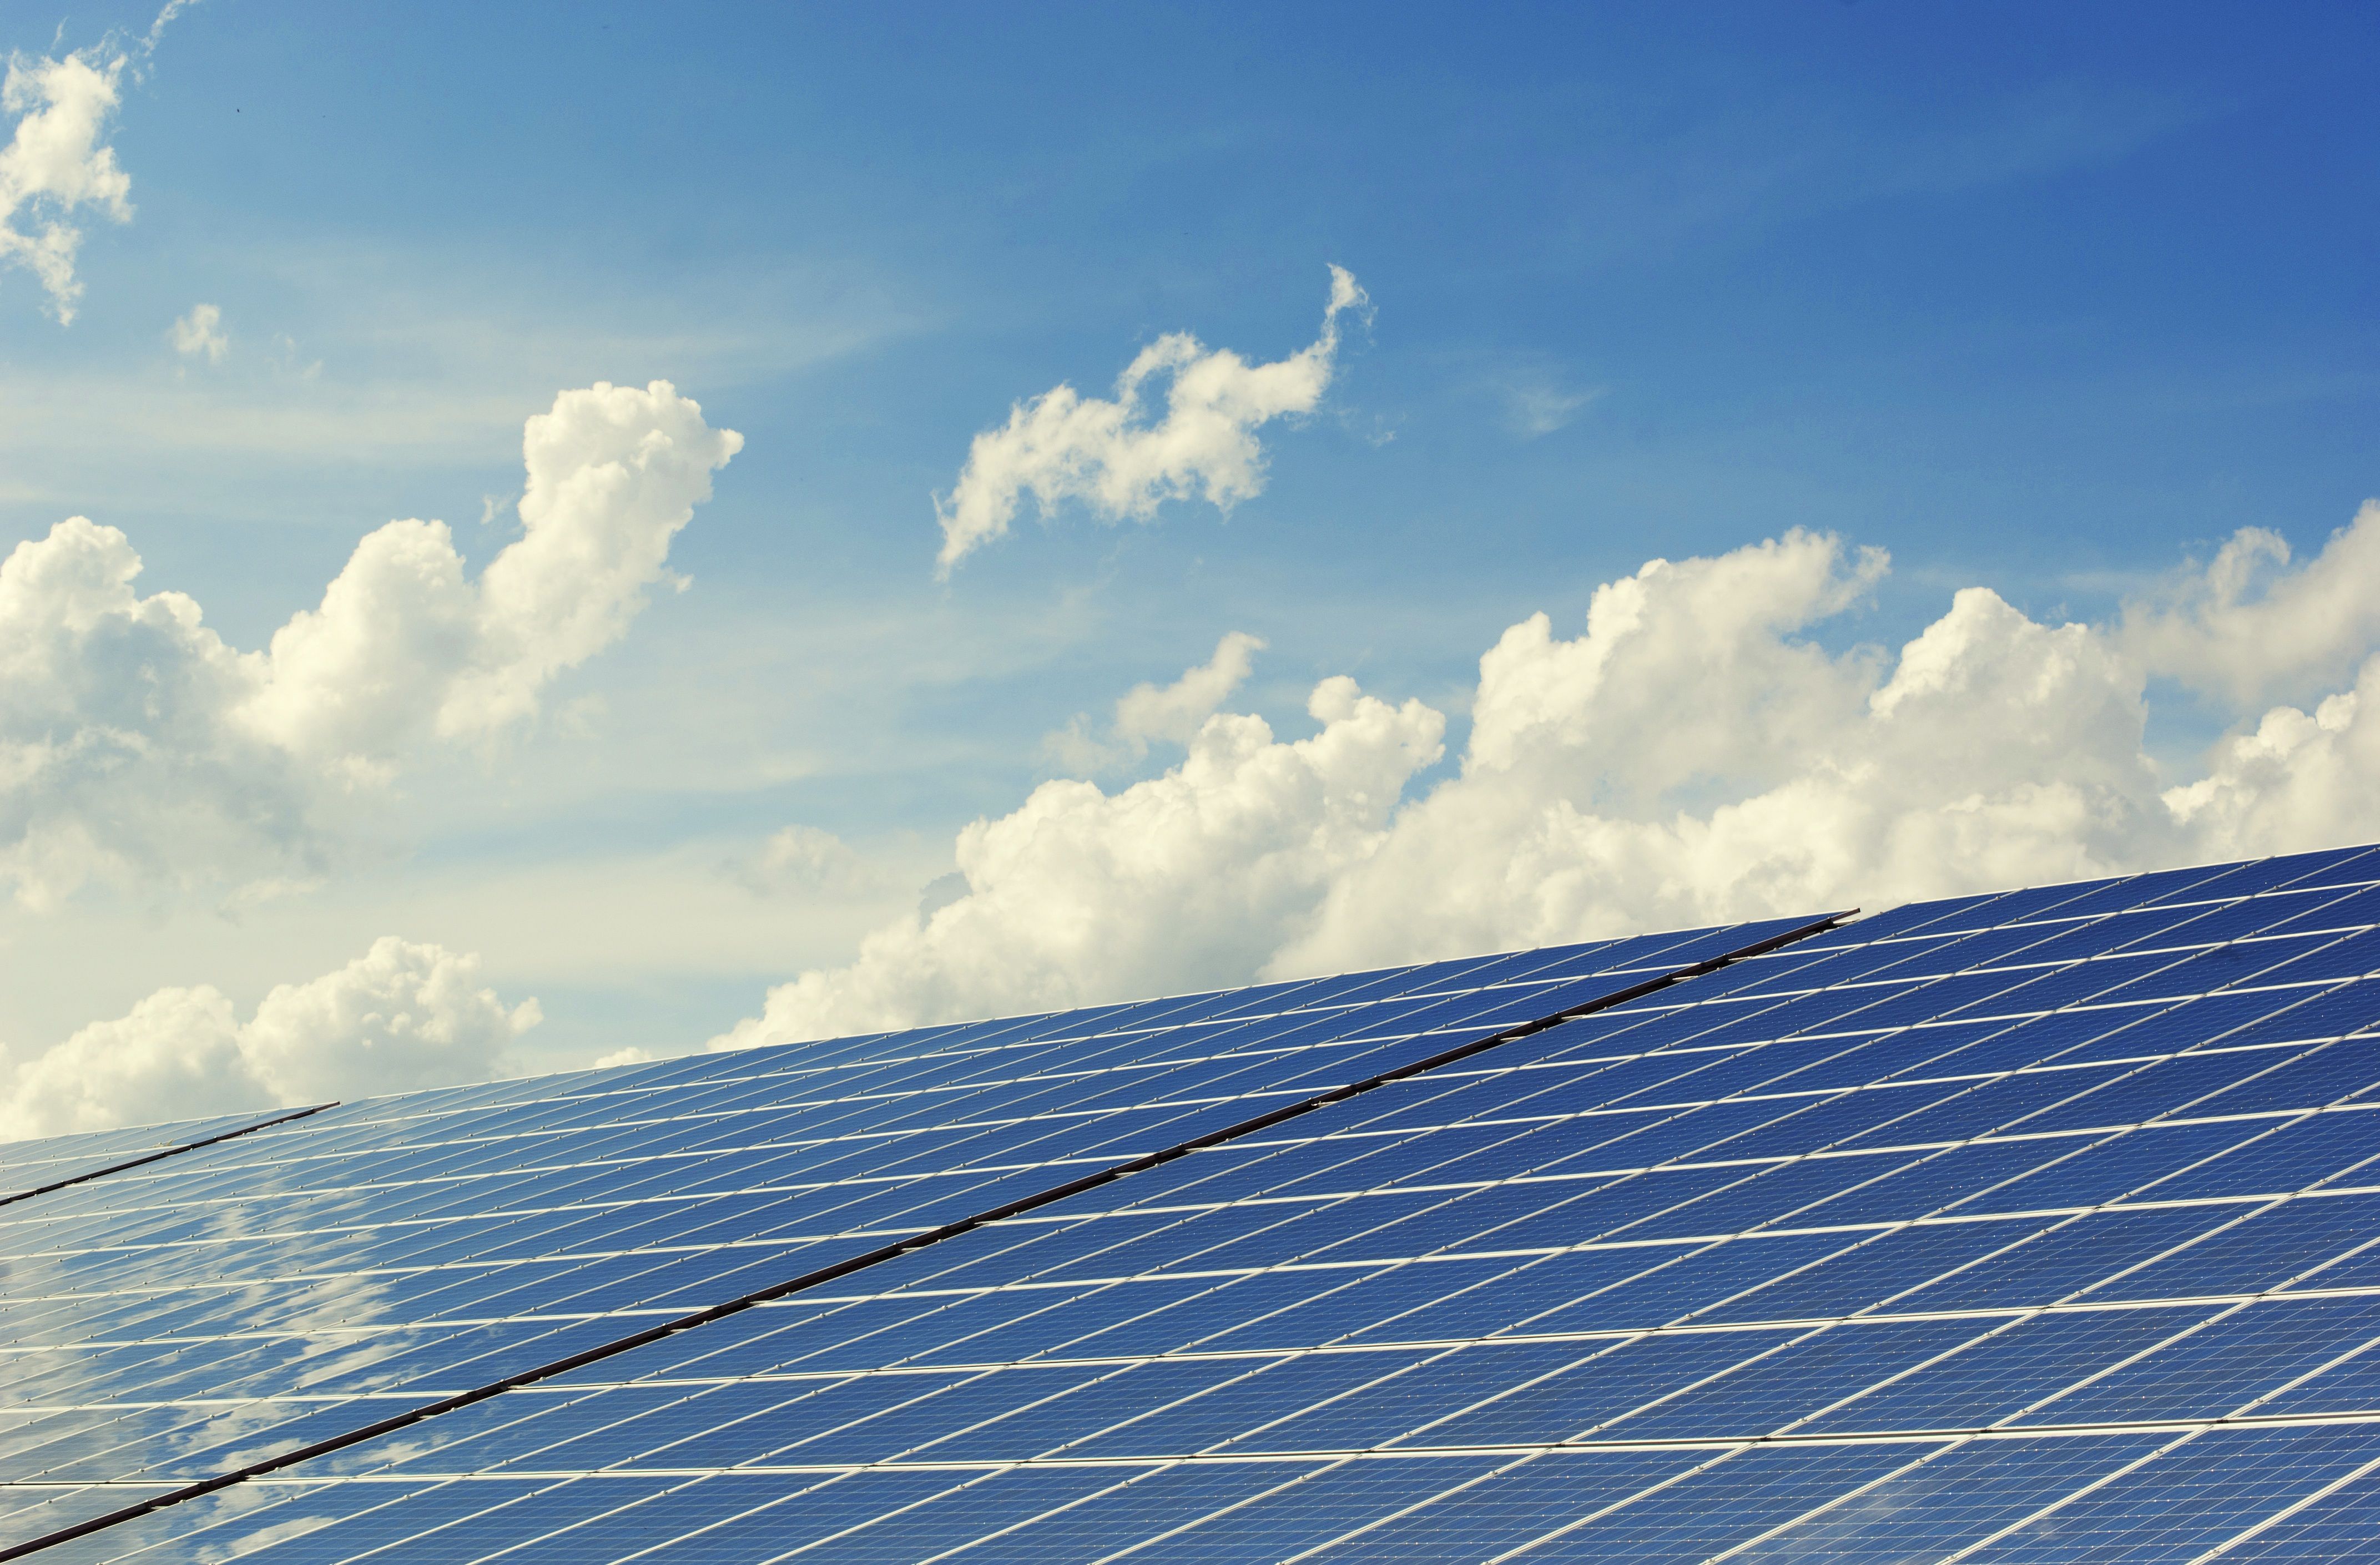
Solar panels in a green field under a blue sky

What Exactly Is Community Solar?

Think of it as a garden—but instead of tomatoes, you’re harvesting kilowatt-hours. A community solar project is a shared array, usually ground-mounted or on a big rooftop, that multiple households or businesses can subscribe to. The electricity flows into the local grid, and subscribers get credits on their existing utility bills. You don’t need to own your home, you don’t need a south-facing roof, and you don’t need to install anything. It’s clean energy without the hardware hassle.

In upstate New York, this model has real legs. We’ve got the land, the sun (yes, even in February), and a state government that’s pushing hard for renewables. The NY-Sun program and the Value of Distributed Energy Resources (VDER) tariff make the economics work for projects our size—around 100 kilowatts—which is small enough to keep local but big enough to matter.

Why Upstate New York Is a Natural Fit

Our region has a scrappy, do-it-yourself streak. When something’s broken, we fix it. When an opportunity’s sitting there, we grab it. Community solar taps right into that. We’ve got former farmland, old industrial sites, and plenty of rooftops that could host panels. Towns are hungry for economic activity that doesn’t depend on a big outside employer. A solar project means lease payments for landowners, a few months of construction work, and ongoing maintenance jobs—all local.

In Binghamton, the lot we chose was a vacant strip near an industrial park, close to existing utility lines. That proximity saved us thousands in connection costs. It also sat in a neighborhood where a lot of families rent. Those neighbors couldn’t put panels on their roofs even if they wanted to. Our array gave them a way to cut their electric bills without asking a landlord’s permission. That felt like a win from day one.

Close-up of solar panels with sunlight reflecting off the surface

Step 1: Find Your People and Get Clear on the Why

Every project I’ve seen succeed started with a handful of stubborn, curious people. Ours was five folks who met at a sustainability fair at the public library. We didn’t have a plan—just a shared itch that our town could do more. We started meeting monthly, same library, same table, and we told everyone we knew. Within three months, twenty people were showing up regularly.

Early on, we hammered out what we actually wanted. Was this just about cheaper bills? A teaching tool for the high school? A way to keep energy dollars in the community? For us, it was all three. We scribbled a mission on a whiteboard: “Build a locally owned solar array that lowers subscriber energy costs, proves community-led renewables work, and puts any extra money into neighborhood energy education.” That sentence became our compass. When things got messy later—and they did—we’d come back to it.

Spotting Your Champions

Look for people whose skills fill gaps you don’t even know you have yet. Our retired accountant turned into a grant-writing machine. The science teacher knew how to explain kilowatt-hours to a room full of skeptical seniors. The business owner had a truck and a trailer and wasn’t afraid of a building permit office. The stay-at-home parent organized our subscriber sign-up table at the farmers market like a pro. None of us were solar experts. Together, we were enough. Reach out to environmental groups, churches, neighborhood associations—anywhere people already gather. A mix of backgrounds makes the whole thing sturdier.

Step 2: Size Up Your Site and Your Community’s Appetite

You need two things before you get serious: a decent piece of land and a bunch of people who want to subscribe. For the land, think south-facing slopes, big commercial rooftops, or open ground that’s not good for farming. Steer clear of wetlands, steep hills, and heavy tree cover. We got lucky—a local surveyor volunteered a few hours to map our lot and confirm it got at least four hours of direct sun daily. That’s the bare minimum for a project to pencil out.

At the same time, we tested the waters. We set up a folding table at the farmers market with a sign that said, “Would you pay less for clean energy?” We handed out flyers at the library. We ran a simple Google Form survey. The question was straightforward: If a local solar project could trim 5–10% off your electric bill, would you sign up? Over 150 households said yes. That stack of responses—real names, real addresses—gave us credibility when we later sat down with funders and town officials.

Getting to Know Your Utility

Most upstate folks are served by NYSEG, National Grid, or a municipal utility. Each one handles community solar billing a little differently. We scheduled a meeting with our utility’s interconnection team before we spent a dime. We walked in with a list of questions: How do VDER credits get calculated? What’s the timeline for interconnection approval? Are there any fees we haven’t heard about? That one meeting saved us months of head-scratching. Don’t skip it. Bring a notebook.

Step 3: Pick Your Legal and Money Structure

This part sounds dry, but it shapes everything. Community solar projects usually take one of three forms:

  • Special Purpose Entity (SPE): Basically an LLC created just for the project. Members can invest and share any returns. It’s flexible and keeps control local.
  • Nonprofit: A 501(c)(3) or similar. You can chase grants and tax-deductible donations, but profits have to go back into the mission.
  • Cooperative: A member-owned setup where each subscriber gets one vote, no matter how much they put in. Very democratic, but can be slower to make decisions.

We went with an LLC. It let us bring in community investors while keeping decision-making tight. We found a lawyer in Ithaca who specialized in renewable energy co-ops and offered a sliding scale for community groups. If legal fees scare you, check for pro bono programs through the New York State Bar Association or clinics at nearby law schools. We paid less than we feared and got documents that held up.

Group of people discussing plans around a table with a solar panel model

Step 4: Scrape Together the Funding

This was the white-knuckle phase. Our 100-kilowatt array cost about $180,000 all in. We stitched it together from a bunch of sources:

  • NY-Sun rebate: Around $30,000 upfront. The installer handled most of the paperwork.
  • Community investment notes: We raised $50,000 from neighbors in $1,000 chunks, paying 3% annual interest over ten years. People liked that their money stayed local.
  • USDA REAP grant: The Rural Energy for America Program came through with $40,000. The application was a beast, but our retired accountant wrestled it into submission.
  • Local credit union loan: The remaining $60,000 at decent terms because the loan officer saw the community angle.
  • Crowdfunding: We ran a month-long campaign with video clips of future subscribers explaining why they were in. That brought in another $8,000.

Don’t be shy about mixing sources. Each one has its own timeline and headaches, but together they add up. And when you can tell a funder that 150 households are already interested, their ears perk up.

Picking an Installer

Get at least three quotes. Ask specifically about community-scale work—residential rooftop experience isn’t the same thing. We chose a firm out of Ithaca that had done several similar arrays. They suggested angling our panels slightly west to catch more late-afternoon sun when grid demand (and credit value) is higher. That tweak boosted our projected returns by a few percent. Small details, big difference.

Step 5: Wrestle with Permits and Interconnection

Permitting felt like a part-time job. Our town required a building permit, site plan approval from the planning board, a special use permit because the lot was zoned industrial, and—of course—the interconnection agreement with the utility. We showed up at the planning board meeting with photos of similar arrays, a support letter from the fire department, and a petition signed by 200 residents. The board approved it unanimously. Preparation and community backing carried the day.

Interconnection was the slowest piece—about four months. The utility studied whether the local grid could absorb our output. Because we’d picked a site near existing infrastructure, no major upgrades were needed. We paid a $2,500 application fee and a $5,000 interconnection charge, both budgeted. My advice: start this process earlier than you think you need to. You can begin before your funding is fully locked in.

Step 6: Build, Subscribe, and Pop the Cider

Construction was almost anticlimactic. The crew finished in three weeks. We held a “panel-raising” day—subscribers came out, watched the installation, asked questions, and drank local cider. That shared moment built a sense of ownership that’s stuck around long after the last bolt was tightened.

Managing subscriptions is ongoing, but it’s not complicated. We track everyone in a spreadsheet: name, allocated kilowatt-hours, contact info. Each month, when utility credits hit, we send a short email update—“The array generated X kWh this month, which means about Y dollars saved for a typical subscriber.” People like seeing the numbers. It keeps them connected and cuts down on confusion.

What I’d Do Differently

If I could rewind, I’d pour more energy into early education. Some neighbors were wary—worried about hidden fees or flaky power. We held three public info sessions. I wish we’d held ten. The conversations that moved people happened one-on-one, often with someone they already trusted. I’d also start the interconnection paperwork the moment we had a site. It’s the longest pole in the tent, and you can chip away at it while fundraising.

Questions We Get All the Time

Do I need to own my home to join?

Nope. That’s the whole point. Renters, condo owners, people with shady roofs—all can subscribe. You just need an electric account with the utility that covers the project area. The credits show up on your regular bill. No landlord sign-off needed.

How much will I actually save?

It varies by project size, your subscription level, and the VDER credit rate. Our subscribers typically save 5–10% on their annual electric costs. For a household with a $1,200 yearly bill, that’s $60–$120 back. Some months the credit is fatter, some leaner, but it averages out.

What if I move to another part of upstate New York?

If you stay in the same utility territory, you can usually transfer your subscription to the new address. Moving outside the area? Most projects let you cancel with 30–60 days’ notice. Read the subscription agreement before you sign—terms differ.

Is community solar better for the environment than rooftop panels?

They’re both good. A single larger array is often cheaper per watt to build and maintain than dozens of small rooftop systems. It also opens clean energy to people who can’t install their own. Every kilowatt-hour from solar displaces one that might have come from a gas plant, so the climate benefit is real either way.

What’s Next for Our Region

New York State is aiming for 70% renewable electricity by 2030 under the Climate Leadership and Community Protection Act. That’s going to take thousands of projects—and they don’t all have to come from big developers. Small, homegrown groups can chip away at that target, one array at a time.

In Binghamton, our project has sparked a few ripples. A neighboring town is planning an array on a closed landfill. A school district is looking at solar canopies over parking lots. Our little group has turned into an informal help desk—sharing templates, budgets, and hard-won lessons. That’s what community sustainability looks like up close: not a single grand gesture, but a bunch of people passing the recipe around.

If you’re reading this and feeling that tug, start small. Call a friend. Walk a site. Ask your utility a question. The path isn’t always straight, but it’s lit by the same sun that’ll power your panels. And the first day your array goes live, you’ll know you helped build something that outlasts you.

Danielle Kowalski is a Binghamton-based community organizer and solar advocate. She coordinates the Southside Community Solar Garden and volunteers with local energy education programs.

How to Start a Community Solar Project in Upstate New York: A Step-by-Step Guide

If you’ve ever looked at a sunny hillside or a sprawling municipal rooftop in our region and thought, “We could be doing something more with that,” you’re not alone. Across Upstate New York, from the Hudson Valley to the Finger Lakes, towns and neighborhoods are discovering that community solar isn’t just for big cities or desert states. It’s a practical, hopeful way to lower energy bills, build local resilience, and take meaningful climate action—right here, with our own hands and our own neighbors.

I’m Danielle Kowalski, and I’ve spent the last few years helping community groups in Binghamton and beyond navigate the path from a good idea to a working solar array. It’s not always a straight line, but it’s a journey worth taking. This guide is for anyone who’s ready to turn curiosity into a plan, and a plan into panels.

What Exactly Is a Community Solar Project?

Community solar is a shared renewable energy arrangement where multiple participants—homeowners, renters, businesses, or nonprofits—benefit from a single solar installation. Instead of each household putting panels on its own roof, a larger array is built in a central location, and the electricity it generates is credited to subscribers’ utility bills. In New York, this is often called “remote net metering” or “community distributed generation.”

For many in our area, this model solves real problems. Maybe your roof is too shaded, or you rent your home. Maybe the upfront cost of a private system feels out of reach. Community solar opens the door to clean energy savings without the need for individual installations. It’s a way to share both the benefits and the responsibilities.

Why Upstate New York Is Ready for Local Solar

We have something special here: a combination of available land, strong state incentives, and a growing appetite for local, clean energy. The New York State Energy Research and Development Authority (NYSERDA) has been steadily expanding programs that make community solar more accessible, especially for low- and moderate-income households. The NY-Sun initiative and the Value of Distributed Energy Resources (VDER) tariff structure are designed to make projects financially viable while ensuring subscribers see real savings on their electric bills.

But beyond the policy, there’s a cultural readiness. Upstate communities have a long tradition of cooperation—from agricultural co-ops to volunteer fire departments. A community solar project fits right into that spirit. It’s neighbors helping neighbors, with the added benefit of reducing our collective carbon footprint.

Step 1: Gather Your People and Define Your Vision

Every successful project I’ve seen started with a small group of committed people around a kitchen table, in a library meeting room, or at a local coffee shop. You don’t need to be an engineer or a lawyer to begin. You need curiosity, patience, and a willingness to learn together.

Start by asking some core questions:

  • Who is this for? Are you focused on helping low-income families, supporting a local school district, or simply offering savings to any resident who wants to join?
  • What scale are we imagining? A small array on a community center roof, or a larger ground-mounted system on a few acres?
  • What values guide us? Do you want local ownership, or are you open to partnering with a developer? Is educational outreach part of your mission?

In Binghamton, a group I worked with started by surveying neighbors about their energy burdens. They discovered that many renters felt left out of the solar conversation. That insight shaped everything—from site selection to subscriber outreach. Your vision will be unique to your place and your people.

Step 2: Understand the Upstate New York Policy Landscape

New York has one of the most supportive policy environments for community solar in the country, but the details matter. Here are the key programs and concepts you’ll encounter:

NY-Sun Incentive Program

NY-Sun provides financial incentives for solar installations, including community solar projects. The incentive levels vary by region and project size, and they step down over time as the market grows. For Upstate projects, the incentives can cover a significant portion of upfront costs. You’ll want to check the current incentive blocks for your utility territory—NYSEG, National Grid, or others—because the available funding can affect your timeline.

VDER (Value of Distributed Energy Resources)

This is the compensation mechanism that determines how much credit your project receives for the electricity it sends to the grid. It’s more complex than simple net metering, but it’s designed to reflect the full value of solar energy, including environmental and grid benefits. For subscribers, the key number is the bill credit rate, which is typically a discount off their regular electricity rate. In Upstate New York, community solar subscribers often see savings of 5–10% on their monthly electric bills.

Low-Income Adder and Inclusive Community Solar

New York offers additional incentives for projects that serve low- and moderate-income (LMI) households. If your project dedicates a certain percentage of capacity to LMI subscribers, you can qualify for higher NY-Sun incentives and a more favorable VDER credit. This can make your project both more impactful and more financially sustainable. It’s a win-win that aligns well with the values of many community groups.

Step 3: Find the Right Site

Site selection can make or break a project. In Upstate New York, we have a mix of urban, suburban, and rural settings, each with its own opportunities and challenges.

Rooftops: Schools, municipal buildings, warehouses, and churches often have large, flat roofs with good sun exposure. A rooftop project can be a visible symbol of community commitment. However, you’ll need to assess structural integrity, roof age, and ownership. A long-term lease or ownership agreement is essential.

Ground-mounted: Open land—perhaps a retired farm field or a brownfield site—can accommodate larger systems. You’ll need to consider zoning, soil conditions, and proximity to three-phase power lines. In rural townships, agricultural districts may have specific rules about solar development, so early conversations with the planning board are wise.

Parking canopies: These are gaining interest, especially at community colleges or municipal lots. They provide shade and generate power, but they’re more expensive per watt than ground-mounted systems. Still, they can be a great fit for sites where land is scarce.

Solar panels installed on a grassy field in a rural setting
A ground-mounted solar array in a rural area, similar to what many Upstate New York communities are considering.

Step 4: Build the Right Team

You don’t have to do this alone, and you shouldn’t. A community solar project needs a mix of skills and perspectives. Here’s who you might want at the table:

  • A project champion: Someone who can keep the group organized, facilitate meetings, and maintain momentum. This could be you.
  • Technical expertise: An engineer or experienced solar installer who can assess sites, estimate production, and explain equipment options.
  • Legal and financial guidance: A lawyer familiar with New York energy law and a financial advisor or accountant who understands cooperative or LLC structures.
  • Community connectors: People with deep local networks—faith leaders, school board members, neighborhood association heads—who can build trust and recruit subscribers.
  • Policy navigator: Someone who can track NYSERDA deadlines, utility requirements, and interconnection rules. This might be a volunteer who learns on the job or a consultant.

Don’t be afraid to reach out to existing community solar groups in New York for mentorship. Organizations like the New York Solar Energy Industries Association (NYSEIA) and Vote Solar have resources and connections that can help you find experienced partners.

Step 4: Develop a Business and Governance Model

This is where the vision gets real. How will the project be owned, financed, and managed over its 25-year lifespan? There are several common models:

  • Developer-owned: A solar company develops, owns, and operates the array. The community group helps with subscriber outreach and may receive a small fee or community benefit fund. This is the simplest path but gives the community less control.
  • Cooperative or LLC: Community members form a legal entity that owns the project. This requires more upfront work and capital but keeps benefits local and allows democratic governance.
  • Nonprofit partnership: A local nonprofit hosts and/or owns the array, using the savings to support its mission. This can work well for schools, churches, or community centers.

In Upstate New York, the cooperative model has been used successfully by several rural communities. They raised capital through member shares, secured a NY-Sun incentive, and contracted with a local installer. The key is to align the financial structure with your group’s capacity and goals. Don’t be afraid to start small and scale up later.

Step 5: Navigate Permitting and Interconnection

This step can feel like a maze, but it’s manageable if you break it down. You’ll need local permits (building, electrical, zoning) and an interconnection agreement with the utility. In Upstate New York, the major utilities are NYSEG, National Grid, and Central Hudson. Each has its own process, but they all follow the state’s Standardized Interconnection Requirements (SIR).

Key tips:

  • Start the interconnection application early—it can take months.
  • Work with an experienced solar installer who knows the local utility’s engineering team.
  • Be prepared for a system impact study if your project is large or in a congested area of the grid.
  • Check if your site is in an agricultural district; you may need a special permit or a letter of non-objection from the NYS Department of Agriculture and Markets.

Many towns in Upstate New York are still developing their solar zoning laws. Your project could be a catalyst for clear, sensible regulations that balance renewable energy development with community character.

Solar panels on a residential rooftop with trees in the background
Rooftop solar on a home in a wooded neighborhood—a smaller-scale option that can inspire larger community projects.

Step 6: Subscriber Outreach and Education

A community solar project only works if people sign up. In our region, trust and personal relationships are everything. Mass mailers and generic ads are less effective than a neighbor explaining the opportunity at a town hall meeting or a church social.

Here’s what has worked well in projects I’ve seen:

  • Host informational sessions at libraries, community centers, and schools. Bring a simple one-page handout that explains the savings, the enrollment process, and the cancellation policy.
  • Partner with trusted local organizations—a food co-op, a credit union, a faith community. Their endorsement carries weight.
  • Be transparent about the numbers. Show exactly how the bill credits work, using a sample utility bill. People want to know: “Will I really save money, and is there any risk?”
  • Address common concerns upfront. No, you don’t need to put panels on your roof. No, you won’t lose power if the array goes down. Yes, you can cancel or transfer your subscription if you move within the same utility territory.

In Upstate New York, where winters are long and heating bills are high, even a 5–10% monthly savings can make a real difference for families. Frame the conversation around tangible benefits, not abstract environmentalism.

Step 7: Construction, Commissioning, and Celebration

Once financing is secured, permits are in hand, and subscribers are lined up, it’s time to build. A typical community solar installation in our region takes 3–6 months to construct, depending on size and weather. You’ll want to keep the community informed during this phase—regular email updates, a construction webcam, or even a hard-hat tour for subscribers can maintain excitement.

When the system is finally connected to the grid and “flips the switch,” make it a community event. Invite local officials, the press, and all the families who will benefit. It’s a moment to celebrate what you’ve accomplished together and to inspire neighboring towns to start their own journey.

People gathered at a community event with solar panels in the background
A community gathering to celebrate a new solar installation—a moment of shared achievement.

Common Challenges and How to Overcome Them

No project is without its hurdles. Here are a few you might encounter in Upstate New York and some practical ways to address them:

Utility Interconnection Delays

Utilities are often backlogged with solar applications. Build a buffer into your timeline, maintain regular communication with your utility’s interconnection team, and consider hiring a consultant who specializes in New York’s interconnection process.

Subscriber Acquisition in Rural Areas

In less densely populated parts of the state, finding enough subscribers within the required utility zone can be tough. Expand your outreach to include small businesses, farms, and municipal accounts. Some projects have successfully partnered with school districts to anchor the subscriber base.

Seasonal Construction Constraints

Upstate winters can delay ground-mounted installations. Plan your construction schedule to avoid frozen ground and heavy snow if possible, or work with an installer experienced in cold-weather construction techniques.

Financing Gaps

If your project is community-owned, raising upfront capital can be a barrier. Explore NYSERDA’s Affordable Solar and Storage Predevelopment and Technical Assistance program, which offers grants for early-stage work. Some groups have also used crowdfunding or partnered with local credit unions for low-interest loans.

Frequently Asked Questions

Do I need to own my home to participate in a community solar project?

No. Renters and homeowners alike can subscribe to a community solar project as long as they have an electric utility account in the same load zone as the project. This is one of the biggest advantages—it opens solar savings to people who couldn’t otherwise access them.

How much can I expect to save on my electric bill?

Most community solar subscribers in Upstate New York see savings of 5–10% on their monthly electricity costs. The exact amount depends on the project’s discount rate, your utility’s rates, and your energy usage. You’ll receive credits on your bill for the solar energy produced by your share of the project.

What happens if I move to another home within the same utility area?

You can typically transfer your subscription to your new address, as long as it’s served by the same utility and within the same load zone. If you move outside the area, you can cancel your subscription—most projects have no long-term contract or a simple cancellation policy.

Is there any risk to my roof or property?

None. The solar panels are installed at a separate site, not on your home. You simply receive credits on your existing utility bill. There’s no equipment on your property and no change to your electric service.

Looking Ahead: A Brighter Future for Our Region

Every community solar project is a statement of hope. It says that we can take control of our energy future, keep more of our dollars local, and leave a healthier planet for the next generation. In Upstate New York, we have the land, the policies, and the community spirit to make this happen. The path isn’t always easy, but it’s well-trodden now—and there are people ready to walk it with you.

If you’re feeling that spark of possibility, I encourage you to gather a few neighbors and start the conversation. Visit NYSERDA’s website to explore current incentives. Reach out to a nearby community solar project and ask what they learned. And remember: every big array started with a small group of people who believed their town could do something remarkable.

Let’s build that future together, one solar panel at a time.

How We Built a Community Solar Project in Upstate New York (and How You Can, Too)

I remember standing in a town hall meeting a few years back, listening to a dairy farmer say he’d rather lease his back pasture for solar panels than sell it for another strip mall. A neighbor two rows behind me whispered, “What if we actually owned it ourselves?” That murmur turned into a question that wouldn’t leave us alone. I’m Danielle Kowalski, and what started as a handful of curious people in Broome County became a 250 kW solar array—owned by the community, powering about 50 homes, and quietly making money for a farmer who needed a second income stream. If you’ve ever looked at an open field and thought, “We could do something here,” this guide is for you. It’s not a glossy brochure. It’s the real, messy, rewarding path we took.

Solar panels on a grassy field under a blue sky

Why Community Solar Fits Upstate New York

Upstate isn’t the sunniest corner of America, but we’ve got something better: wide-open spaces, strong state backing, and towns full of people who like the idea of energy independence. Community solar lets folks buy or subscribe to a share of a local array and see credits right on their monthly electric bill. No rooftop panels needed. That’s a game-changer for renters, condo owners, and anyone with a shady roof.

New York’s Climate Leadership and Community Protection Act and NY-Sun program actively encourage these projects. The state wants distributed generation, and it’s willing to help pay for it. But the real engine is local—neighbors who’d rather keep their energy dollars circulating in the community than send them off to a distant utility.

Step 1: Gather Your People and Get Clear on the “Why”

You can’t do this solo. Find five to ten people who bring different strengths: someone who knows local politics, someone good with spreadsheets, a landowner, a communicator. We met in church basements and library conference rooms, fueled by coffee and a shared stubbornness. Early on, we hammered out a one-page vision: “To build a member-owned solar array that cuts energy costs for 50+ households and keeps the land in farming.” That sentence became our north star when things got tangled.

Then we went public—not with a press release, but with a folding table at the farmers’ market. We had photos of other community solar sites, a simple diagram showing how credits work, and a sign-up sheet for an email list. People’s first questions were practical: “Will it be loud?” (No—panels don’t make noise.) “Will it look industrial?” (We screened ours with a row of existing maples.) “What if I move?” (We’ll get to that.) Listening to those worries shaped everything that followed.

Community members gathered around a table discussing plans

Step 2: Wrap Your Head Around the Rules

New York is a great place for community solar, but the paperwork is real. You’ll need to understand three layers: local zoning, utility interconnection, and the state’s Community Distributed Generation (CDG) program. We spent two months just reading PDFs and leaving voicemails for people at the Public Service Commission.

  • Zoning: Pull your town or county code. Some places have a clear solar ordinance; others lump it under “special use,” which means a public hearing. We worked with our planning board to update the language so community solar was explicitly allowed—no gray areas.
  • Interconnection: You’re plugging into the grid, so your utility (NYSEG, National Grid, etc.) has a formal application process. Engineering reviews can drag on for months. Start this earlier than you think is reasonable.
  • CDG rules: You’ll form a legal entity—we chose an LLC—and register with the state. Subscribers must be in the same utility territory and generally the same load zone. A local attorney who knew energy co-ops helped us draft an operating agreement. It cost a few thousand dollars, but it kept us out of legal swamps later.

Step 3: Lock Down a Site and Test Its Mettle

You need land that’s sunny, accessible, and owned by someone who’s genuinely on board. In Upstate, south-facing slopes or flat fields away from floodplains are your best bet. Steer clear of wetlands and endangered species habitat—environmental reviews can sink a project. We found a 6-acre patch on a dairy farm, too rocky for corn but perfect for panels. The farmer became a member and now gets lease payments that buffer the ups and downs of milk prices.

Do a site assessment. If you’ve got a technically minded volunteer, the National Renewable Energy Lab’s PVWatts calculator is free and decent. Our spot averages about 4.2 peak sun hours a day—solid for this region. Also, dig a test hole or two. You want to know the soil won’t turn to soup during spring thaw and swallow your racking posts.

Step 4: Design the System and Pick Your Gear

Community arrays usually land between 100 kW and 5 MW. Ours is 250 kW, enough for roughly 50 households. We went with bifacial panels—they catch light from both sides, which gives a little boost when snow reflects sunlight. Fixed-tilt racking at 30 degrees kept things simple and cheaper than tracking systems.

Hire a solar engineer or a design-build firm that’s done this before. They’ll produce a site plan, electrical diagrams, and a shading analysis. This is also when the real price tag comes into focus. Our total was about $300,000: panels, inverters, racking, wiring, installation, permits, legal fees. It’s a big number, but the next step is where you tackle it.

Solar panels installed on farmland with mountains in the background

Step 5: Figure Out the Money

This is the part where a lot of groups get stuck. You need a financial structure that’s fair and transparent. We set up an LLC with member-investors. Each household buys a share sized to their typical electricity use—usually between $1,000 and $3,000. In return, they get bill credits for 20 years. We also snagged a USDA Rural Energy for America Program (REAP) grant that covered 25% of the cost. New York’s NY-Sun program kicked in a per-watt rebate for community solar, which helped close the gap.

Build a pro forma spreadsheet. Project revenue from subscriptions, subtract operating costs (insurance, maintenance, land lease), and estimate payback. We assumed production 10% below the engineer’s forecast, just to be safe, and still hit a 7-year payback for members. A regional credit union gave us a low-interest loan—they understood the mission better than the big banks did.

Step 6: Permits, Patience, and the Interconnection Tango

This phase will test your nerves. You’ll need building permits, electrical permits, maybe a special use permit, and definitely utility sign-off. Our planning board wanted a visual impact assessment, so we showed how the existing tree line would screen the array from the road. We also submitted a decommissioning plan: after 25–30 years, panels get recycled and the land goes back to farming.

Interconnection was the longest wait. The utility required a detailed engineering study to confirm the local grid could handle the extra generation. We paid a $2,500 application fee and waited four months. Once approved, we signed an interconnection agreement that spelled out metering and safety protocols. Don’t forget to brief your fire department—they need to know how to work safely around a live solar array during an emergency.

Step 7: Build It and Flip the Switch

After all that planning, construction felt almost quiet. Our install took about three weeks. A crew drove racking posts into the ground, bolted on rails and panels, and pulled wire. We hired a local electrical contractor with commercial solar experience. Volunteers handled site prep—clearing brush, spreading gravel for access paths.

When the system was physically done, the utility installed a bidirectional meter and ran a witness test. They verified the array would shut down instantly if the grid lost power. Then we threw the switch. Watching that meter spin backward for the first time—I still get a little choked up thinking about it.

Step 8: Sign Up Subscribers and Keep Things Running

We already had a waiting list from our outreach, but we still needed formal subscription agreements. Each one spells out the member’s share, the credit rate, and the term. The utility handles the actual billing—credits show up right on each person’s electric bill. Our LLC sends a monthly statement with production numbers and credit allocations.

Ongoing management is lighter than you’d expect. We pay a local solar O&M company $1,500 a year to monitor performance, clean panels twice annually, and handle repairs. The LLC meets quarterly to review finances and vote on anything major. We keep a reserve fund for surprises—so far, the only hit was replacing an inverter after a lightning strike.

Stuff We Wish We’d Known Sooner

  • Start interconnection yesterday. Utility timelines are slow and unpredictable. You can’t hurry them, so build that buffer in early.
  • Show up at town board meetings before you need anything. Let officials see your face and hear that you’re a local group, not an out-of-state developer.
  • Share your full budget. When numbers look too tidy, people get suspicious. We handed out our spreadsheet at information sessions. It built trust.
  • Plan for snow. Tilted panels shed snow pretty well, but a heavy, wet dump can blanket them for days. We budget for lower winter output.
  • Throw a party when you hit milestones. Our “flip the switch” gathering had local food, a bluegrass band, and kids running around. It brought in new members and reminded us why we started.

Frequently Asked Questions

Do I need to own land to participate in community solar?

Not at all. That’s the whole point. You can subscribe to a share and get credits on your electric bill whether you rent, live in an apartment, or have a roof shaded by old oaks. You just need to be in the same utility territory as the array.

How long does it take to develop a community solar project?

From our first basement meeting to flipping the switch, it took about two and a half years. The timeline depends on site readiness, permitting, and utility interconnection. A group with a shovel-ready site and strong local backing could pull it off in 18 months.

What happens if I move away from the area?

Your subscription is tied to your utility account, not your name. If you move within the same utility territory, you can usually transfer it to your new address. If you move outside the territory, you can sell your share back to the LLC or to another eligible member, depending on how your operating agreement is written.

Is community solar really cheaper than regular electricity?

For most people, yes. Our members save about 10% on their electric bills compared to standard utility rates. The exact savings depend on project costs, incentives, and the utility’s prevailing rates. Over 20 years, those savings stack up, especially as utility rates tend to climb.

Community solar isn’t just about shaving a few dollars off your bill. It’s about keeping energy dollars close to home, giving a farmer a reason to hold onto their land, and doing something you can actually see for the climate. Upstate New York has the land, the policies, and the stubborn, practical people to make this work. If you’ve got a handful of neighbors ready to dig in, there’s no reason you can’t do it too.

Start small. Have that first conversation. Visit an existing community solar site—there are dozens across the state now. Ask questions. The path is there, and it’s more traveled than you might think.

How to Start a Community Solar Project in Upstate New York: A Practical Guide

If you’ve ever looked at a sunny rooftop or an open field in your town and thought, “We could do something good with that space,” you’re not alone. Across Upstate New York, neighbors are coming together to build community solar projects that lower electric bills, create local jobs, and shrink our collective carbon footprint. I’m Danielle Kowalski, and after helping organize two community solar arrays in the Southern Tier, I’ve learned the process is less about high-tech complexity and more about patient, step-by-step organizing. This guide covers what actually works—the stuff I wish someone had handed me when we started.

Solar panels on a residential roof under a blue sky

What Community Solar Means in New York State

Community solar allows multiple households, renters, small businesses, and even municipal buildings to share the output from a single solar installation. You don’t need to own a sunny roof or have thousands of dollars upfront. Instead, you subscribe to a portion of a larger array—often built on old farmland, a capped landfill, or a big commercial rooftop—and receive credits on your regular utility bill. New York’s policies, especially the expanded NY-Sun Initiative and the state’s goal of 10 gigawatts of distributed solar by 2030, make this model particularly attractive right now.

In our region, long winters and cloudy days don’t cancel out the benefits. Upstate solar arrays produce plenty of electricity over the course of a year, and the financial structure is built around total annual production, not minute-by-minute sunshine. The main thing to understand is the difference between community distributed generation (CDG) and smaller shared solar projects. Most neighborhood-scale efforts fall under CDG rules administered by the New York State Public Service Commission.

Step One: Find Your People and Your Purpose

Before you touch a panel or call an installer, you need a core group of committed locals. The projects that last tend to start with a mix of people: a town board member, a couple of homeowners, maybe a farmer with unused land, and someone who genuinely enjoys spreadsheets. Hold a few informal meetings—at the library, a church basement, or even someone’s backyard—and ask two questions: Why do we want this project? and Who else needs to be at the table?

In our first project, the initial goal was simply to cut electric bills for low-income seniors. That clarity helped us later when we applied for grants and talked to landowners. Write down your purpose in one sentence and keep it visible. It’ll anchor you when the process gets tangled—and it will get tangled.

Building a Local Steering Committee

A steering committee of five to seven people works well. Include someone with legal or contract experience, someone comfortable with public outreach, and at least one person who understands the local political landscape. If your town supervisor or a county legislator is willing to join, even as an informal advisor, that can smooth permitting later. Don’t worry if you lack technical expertise; you’ll hire that. Your job is to represent the community’s interests and keep the project grounded in what neighbors actually need.

Step Two: Site Selection and Early Feasibility

Community solar arrays need roughly five to twenty acres of land with good southern exposure, minimal shading, and proximity to three-phase power lines. In Upstate New York, old farmland, brownfields, and large commercial rooftops are common candidates. Walk the land with a solar developer—many will do a free preliminary site assessment—and ask about interconnection costs. A site that looks perfect can become uneconomical if the nearest substation is miles away. I’ve seen a promising field get shelved because the cost of running new power lines ate up the entire budget.

You’ll also need to check local zoning. Some towns have solar ordinances; others treat ground-mounted arrays as a special use requiring a permit. Engage with your planning board early. Bring a simple sketch and be ready to explain how the project fits the community’s character. In our case, we proposed planting native pollinator habitat under the panels, which turned a potential objection into a selling point. People love the idea of bees and butterflies thriving alongside clean energy.

Solar panels installed in a grassy field with trees in the background

Step Three: Choose a Business Model

Most community solar projects in New York follow one of two paths: a developer-owned model where a company finances, builds, and operates the array, and residents subscribe to save on their bills; or a community-owned model where a local entity—often a nonprofit or a cooperative—owns the project and members share the benefits more directly. Developer-owned is faster and carries less financial risk for the community. Community-owned takes more time and fundraising but can deliver greater local control and long-term returns. Neither is inherently better; it depends on your group’s capacity and appetite for risk.

If you go the developer route, you’ll negotiate a host agreement if the array sits on community land, or a lease if it’s on private property. Make sure the agreement includes a decommissioning plan: who removes the panels at end of life, and who pays. If you choose community ownership, you’ll likely need a partner with experience in project finance. The New York State Energy Research and Development Authority (NYSERDA) offers technical assistance and can connect you with vetted developers who’ve done this before.

Understanding the Subscription Model

Subscribers receive credits on their electric bills based on their share of the solar array’s production. In New York, these credits appear directly on the utility bill through a mechanism called net metering or, for larger projects, Value of Distributed Energy Resources (VDER). Most residential subscribers save 5–10% on their annual electricity costs. The project itself earns revenue by selling those credits, often at a slight discount to the retail rate, which is how the developer recoups their investment. It’s not magic—just a straightforward credit system that rewards collective generation.

Step Four: Land, Permits, and Interconnection

Once you have a site and a business structure, the paperwork begins. You’ll need a lease or purchase agreement for the land, a special use permit or site plan approval from the local municipality, and an interconnection agreement with the utility—likely NYSEG, National Grid, or Central Hudson in Upstate New York. The interconnection process can take six to twelve months, so start early. Your developer or engineering partner will handle the technical studies, but you should track deadlines and keep the planning board informed. A missed deadline can set you back months.

Environmental review is usually straightforward for small- to mid-scale projects, but if your site is near wetlands or in an agricultural district, expect extra scrutiny. Hiring a local environmental consultant who knows the county’s review process can prevent months of delay. In one town I worked with, a simple wildlife survey cost $2,000 and saved the project from a lawsuit later. That’s money well spent.

Step Five: Financing and Incentives

Community solar projects in New York can tap several incentive layers. The federal Investment Tax Credit (ITC) currently covers 30% of eligible costs. New York’s NY-Sun Megawatt Block Program provides upfront incentives based on project size and location. For projects serving low- to moderate-income households, NYSERDA’s Solar for All program adds bonus incentives. Stacking these can cover 40–60% of total project costs. That’s real money that changes what’s possible.

If you’re pursuing community ownership, you’ll likely need a mix of grants, local investment, and debt. Some groups have successfully raised capital through community investment notes—essentially low-interest loans from residents who want to support the project. Others have partnered with mission-aligned lenders like the Cooperative Fund of the Northeast. Don’t underestimate the power of a well-written grant proposal; our second project received a $50,000 seed grant from a regional foundation focused on rural economic development. That grant gave us credibility with other funders.

Close-up of solar panels with sunlight reflecting off the surface

Step Six: Construction and Commissioning

Construction itself is often the shortest phase—typically eight to twelve weeks for a ground-mounted array. But it’s also the most visible, so communication is critical. Send a postcard to neighbors within a half-mile radius explaining the timeline, truck routes, and who to call with questions. Post regular updates on a project website or town bulletin board. When the array is complete, the utility will conduct a witness test before allowing it to connect to the grid. Plan a small celebration; it’s a big moment. We had coffee and donuts at our commissioning, and half the town showed up.

Ongoing Operations and Community Engagement

After commissioning, the array needs monitoring, vegetation management, and occasional maintenance. In a developer-owned model, the developer handles this. In a community-owned model, you’ll contract with an operations and maintenance (O&M) provider. Either way, keep subscribers engaged with quarterly updates on production and savings. Some projects host annual site visits or create a community benefit fund—a small percentage of revenue set aside for local causes like a food pantry or a scholarship. That fund can become a point of pride for the whole town.

Lessons Learned from Upstate Projects

Every community solar project I’ve been part of has taught me something unexpected. Here are a few lessons that might save you headaches:

  • Start with the utility, not the panels. Understanding your local utility’s interconnection queue and credit rates shapes everything else. Call their distributed generation team before you sign a lease. I learned this the hard way.
  • Over-communicate with neighbors. Even people who support renewable energy can get nervous about construction traffic or glare. A simple FAQ sheet and a phone number go a long way. Rumors spread faster than facts.
  • Build in flexibility for subscribers. People move, incomes change, and renters come and go. A subscription agreement that allows transfers or short-term commitments without penalty keeps the project inclusive. Locking people in for decades doesn’t work in real life.
  • Don’t ignore the tax assessor. In New York, solar installations are generally exempt from property tax increases, but you must file the right exemption paperwork. Miss it, and the landowner could face an unexpected bill. That’s a conversation you don’t want to have.

Frequently Asked Questions

Can renters and apartment dwellers participate in community solar?

Yes, and this is one of the best features of the model. As long as you have a utility account in your name, you can subscribe to a community solar project and receive credits on your bill. There’s no need to own property or modify your building. Some projects even set aside a portion of subscriptions specifically for low-income renters to ensure broad access. It’s one of the few clean energy options that works for people who don’t own a roof.

What happens if I move to another part of New York State?

Most subscription agreements allow you to transfer your share to another eligible utility customer, or simply cancel with 30 to 90 days’ notice. If you move within the same utility territory, you can often keep your subscription. If you move to a different utility region, you’ll need to cancel and potentially subscribe to a project in your new area. Always read the cancellation terms before signing—don’t just skim them.

How long does it take from the first meeting to flipping the switch?

Realistically, plan on two to three years. The early organizing and site selection can take six months; permitting and interconnection often take a year; financing and construction add another six to nine months. Projects can move faster with an experienced developer and a supportive local government, but it’s wise to set expectations for a multi-year effort. The good news is that once the array is operating, it will produce clean energy for 25 years or more. That’s a long payoff.

Is community solar actually cheaper than regular electricity?

For subscribers, yes—most see savings of 5–10% on their annual electric bills. The exact amount depends on the project’s pricing model and your utility’s rates. Some projects offer a fixed discount rate, while others provide a variable credit that fluctuates with market prices. In either case, the goal is to deliver net savings over the course of a year. Ask for a clear savings illustration before you subscribe, and don’t be shy about questioning the numbers.

Resources to Get Started

You don’t have to figure this out alone. NYSERDA’s Community Solar Program page offers guides, case studies, and a directory of approved developers. The New York Solar Energy Industries Association (NYSEIA) hosts workshops and can connect you with member companies that have experience in rural and small-town projects. For groups interested in community ownership, the Cooperative Development Institute provides technical assistance on governance and member investment structures.

If you’re in the Binghamton area or anywhere across the Southern Tier, reach out to your county’s planning department. Many counties have completed solar siting studies that identify preferred locations and simplify permitting. And don’t forget the power of neighboring towns: visit a completed project, talk to the people who built it, and ask what they wish they’d known at the start. Those conversations are often more valuable than any official guide. I still call up folks from the first project when I’m stuck.

Building a community solar project is a long game, but it’s one that pays off in lower bills, stronger local ties, and a visible commitment to a cleaner future. The sun falls on all of us—why not put it to work together?

How to Start a Community Solar Project in Upstate New York: A Step-by-Step Guide

Why Community Solar Makes Sense for Upstate New York

When I first looked into solar panels for my home in Binghamton, the numbers didn’t add up. My roof is shaded by a century-old maple, and the upfront cost felt like a wall I couldn’t climb. Then I learned about community solar—a model where neighbors share a single, ground-mounted array and everyone gets credits on their electric bills. For towns across the Southern Tier and Finger Lakes, this approach can turn a vacant field into a source of local power, stable energy costs, and a tangible climate solution.

Upstate New York has a surprising advantage: wide-open spaces, strong state incentives, and a growing appetite for energy independence. NYSERDA’s NY-Sun program and the Community Distributed Generation framework make shared solar projects financially viable. But the real engine is people—neighbors willing to organize, ask questions, and stick with a process that can take two to three years. This guide walks through the practical steps, from that first conversation to flipping the switch.

Solar panels in a green field under a blue sky

Step 1: Gather Your People and Define the Vision

Community solar starts with community. In Ithaca, a group of neighbors began meeting in a church basement. Over in Buffalo, a block club turned a vacant lot into a solar garden. You don’t need a formal organization right away—just a handful of committed people who can spread the word. Host a public meeting at the library, put flyers in coffee shops, and talk to your town supervisor. The goal is to gauge interest and identify potential subscribers: homeowners, renters, small businesses, even schools or municipal buildings that want to offset their electric bills.

Early on, you’ll need to settle on the project’s scale and structure. A typical community solar array in upstate New York runs between 100 kW and 5 MW, serving anywhere from 20 to 500 subscribers. You’ll also need to choose a legal model. Many groups form a limited liability company (LLC) or partner with a nonprofit sponsor. In New York, the “anchor subscriber” model is popular: one large user—like a school or factory—commits to a big share, which helps secure financing, while smaller residential subscribers fill out the rest.

Step 2: Find the Right Site

Site selection can make or break a project. You’re looking for flat or gently sloping land, ideally south-facing, with minimal shading from trees or buildings. A couple of acres is enough for a small array, but five to ten acres gives you room to grow. Brownfields, capped landfills, and old industrial sites are often perfect—they’re already cleared, and New York offers extra incentives for reusing them. Check with your county’s planning department about zoning; most agricultural and industrial zones allow solar, but residential areas may require a special permit.

Soil matters less than you might think, but you’ll still need a geotechnical survey to confirm the ground can support racking systems. Wetlands, floodplains, and steep slopes add cost and permitting headaches. Proximity to three-phase power lines is a big deal. If the nearest suitable line is miles away, the expense of running a connection can sink the project. National Grid and NYSEG have online maps showing distribution lines, or you can ask their interconnection teams directly.

Solar panels in a field with a farmhouse in the background

Step 3: Navigate New York’s Incentive Landscape

New York State is one of the best places in the country for community solar, thanks to layered incentives. The NY-Sun Megawatt Block Program offers upfront rebates that vary by region and project size. The Community Distributed Generation (CDG) framework ensures subscribers get credits on their utility bills for their share of the solar output. And the federal Investment Tax Credit (ITC) still covers 30% of eligible costs. For nonprofit sponsors, the Inflation Reduction Act’s Direct Pay provision turns that credit into a cash refund—a huge boost for community-led projects.

Bill credits typically range from 8 to 14 cents per kilowatt-hour, depending on your utility and rate class. Low-income subscribers can stack additional incentives through NYSERDA’s Solar for All program, often bringing their net cost to zero. You’ll need a financial model that projects these revenue streams over 20–25 years. Some groups hire a consultant for this step, but free resources like NYSERDA’s Solar Guidebook can get you started.

Step 4: Choose Your Partners Wisely

Unless your group includes experienced solar developers, electricians, and lawyers, you’ll need outside help. A reputable solar developer can handle design, permitting, and construction. Look for firms with community solar experience in New York State—ask for references from similar-sized projects. Your installer should be NABCEP-certified and comfortable with NYSERDA’s paperwork. A local attorney can help structure the LLC, draft subscriber agreements, and navigate securities law (selling shares in a solar project can trigger regulations).

Don’t overlook a good accountant. Community solar projects involve complex tax equity structures, especially if you’re using the federal ITC. Some groups partner with a tax equity investor who provides upfront capital in exchange for the tax credits. Others form cooperatives where members directly own shares. Each path has different legal and financial implications. Interview at least three developers and two law firms before committing. Ask about their experience with NYSERDA’s Community Solar Adder, which provides extra incentives for projects serving low-income subscribers.

Step 5: Permitting, Interconnection, and Construction

Once you have a site and a developer, the paperwork begins. You’ll need local permits (building, electrical, sometimes special use), an interconnection agreement with the utility, and NYSERDA incentive approval. The interconnection process alone can take 6–12 months, depending on grid capacity. Your developer should handle most of this, but the community group must stay engaged—attend planning board meetings, write letters of support, and keep subscribers informed.

Construction typically takes 3–6 months. During this phase, the developer will clear the site, install racking, mount panels, and connect to the grid. It’s a good time to plan a “groundbreaking” event to maintain community excitement. After construction, the system undergoes testing and commissioning. The utility installs a bidirectional meter, and NYSERDA verifies the installation. Then, the real reward begins: subscribers start seeing credits on their electric bills.

People discussing plans over a map in a community meeting

Step 6: Managing the Project Long-Term

A community solar array isn’t a “set it and forget it” asset. Panels need occasional cleaning, vegetation must be managed, and the inverter may need replacement after 10–15 years. Your operating agreement should spell out who handles maintenance—usually the developer for the first few years, then a local contractor. Subscriber management is ongoing: people move, sell homes, or want to change their share. A good software platform can automate billing and credits, but someone needs to answer questions and recruit new subscribers when others leave.

Consider forming a steering committee that meets quarterly to review performance, finances, and community engagement. Some projects host annual “solar open houses” where subscribers can visit the array, see how it works, and connect with neighbors. This builds long-term support and can even inspire other community projects—a school rooftop array, a solar carport at the town hall, or a resilience hub with battery storage for emergencies.

Frequently Asked Questions

Do I need to own my home to join a community solar project?

No. Renters, condo owners, and even businesses that lease their space can subscribe. You simply need an electric utility account in the project’s service territory. The credits appear directly on your existing bill.

What happens if I move within the same utility area?

You can usually transfer your subscription to your new address, as long as it’s served by the same utility and within the project’s designated zone. If you move outside the zone, you may need to cancel, but there’s typically no penalty.

How much can I expect to save on my electric bill?

Savings depend on the project’s size, your utility’s credit rate, and your household usage. Most subscribers see a 5–10% reduction in their annual electric costs. Low-income subscribers in NYSERDA’s Solar for All program can save even more.

Is there a risk if the solar array underperforms?

Reputable developers guarantee a minimum production level in the subscriber agreement. If the array produces less, you still receive the guaranteed credit. Weather variations are factored into the financial model, so a cloudy year shouldn’t surprise you.

Resources to Get Started

If you’re ready to explore a community solar project in your town, here are a few places to begin:

  • NYSERDA Community Solar Guidebook: Step-by-step technical and regulatory guidance for project organizers.
  • NYSERDA NY-Sun Program: Details on incentive blocks and application processes.
  • DSIRE New York Solar Incentives: A comprehensive list of state and federal incentives.

Community solar is more than panels and credits—it’s a way for upstate towns to take control of their energy future, keep dollars local, and build something that lasts. The process takes patience, but the result is a tangible asset that benefits everyone who plugs in.

How to Build a Community Solar Project in Upstate New York: A Practical Roadmap

Why Upstate New York Is Ready for Community Solar

On a brisk autumn morning in Binghamton, I stood with a handful of neighbors on the roof of our local community center, squinting at the southern sky. We weren’t there for the view. We were measuring sun exposure, dreaming of panels, and wondering if a small group of determined people could actually build something that would lower electric bills and shrink our carbon footprint. That was three years ago. Today, that rooftop holds a 45-kilowatt array, and 22 households—including renters and retirees on fixed incomes—receive credits on their utility statements every month. If you’re reading this, you might be wondering whether your town or neighborhood can do the same. The answer is yes, and the path is more straightforward than you might think.

Community solar is a shared renewable energy setup where multiple participants benefit from one installation. In upstate New York, the model has caught on not because of sweeping policy pronouncements, but because electricity rates run stubbornly high, winters stretch long, and people care about keeping money in the local economy. NY-Sun incentives and the state’s Value of Distributed Energy Resources (VDER) tariff make projects pencil out even at a modest scale. This article walks through the real steps—from gathering neighbors to flipping the switch—drawn from our experience in the Southern Tier.

Solar panels on a community building roof under a clear blue sky

Start with People, Not Panels

The technical side of solar is pretty well mapped out. The human side? That’s what makes or breaks a community project. Before you research inverters or fill out interconnection forms, sink time into relationships. Our group kicked off with a simple flyer at the public library and a five-minute announcement during a town board meeting. We invited anyone curious to a potluck at the fire hall. Twelve people showed. Half stayed involved for the long run.

Identify Your Core Team

You need at least three committed people who can split the work: one person comfortable with numbers and spreadsheets, one who enjoys outreach and communication, and one willing to learn the regulatory and utility stuff. For us, a retired accountant handled the financial modeling, a schoolteacher managed newsletters and social media, and I took on project management and permitting. None of us were experts when we started. We got capable by doing the thing.

Gauge Community Interest

Host a public info session. Keep it casual. Explain the basics—subscribers pay nothing upfront, the panels go on a suitable roof or ground-mount spot, and participants get a discount on their electricity bill. Address the big fears: “Will I lose power when it’s cloudy?” (No, you stay connected to the grid.) “What if I move?” (The subscription can often transfer to another address in the same utility territory.) Use a plain sign-up sheet to collect names, addresses, and utility account numbers. You need enough interest to justify the installation size; usually, a project requires at least 10 to 15 committed subscribers to make sense.

Neighbors gathered around a table with solar plans and coffee cups

Choose a Site That Works for Everyone

Finding the right location is a balancing act. You need strong, unshaded southern exposure, a roof or landowner willing to host for at least 20 years, and proximity to existing utility infrastructure. Up here, snow load and ice have to be part of any structural conversation.

We looked at an abandoned parking lot, a south-facing hillside on a dairy farm, and a handful of municipal buildings. The community center roof won because it was large, flat, and owned by a supportive nonprofit. If your group lacks an obvious site, approach your town supervisor or school board. Public buildings often have underused roofs and can benefit from lease payments or discounted electricity. For ground-mount arrays, consider brownfields or low-value agricultural land. Just make sure the zoning code allows solar as a primary or accessory use; many upstate towns have updated their ordinances in recent years.

Conduct a Preliminary Site Assessment

You don’t need an engineer yet. Use the National Renewable Energy Laboratory’s PVWatts tool to estimate annual production based on location, tilt, and azimuth. Walk the site at different times of day to check for shading from trees, chimneys, or neighboring buildings. Document everything with photos. If the site passes this informal review, then hire a professional for a structural analysis and shade study. Our structural engineer charged $1,200 and confirmed the roof could handle the added weight with minor reinforcement.

Structure the Project Legally and Financially

This is where many groups stall. The paperwork can feel muddy, but you’re basically choosing among a few well-worn models. The most common in New York is the subscription model: a legal entity—often a limited liability company or a nonprofit—owns the array and sells the electricity credits to subscribers. Alternatively, you can partner with an existing solar developer who handles financing, construction, and subscriber management, while your group focuses on recruitment and local buy-in.

The Subscription Model in Practice

Our group formed a multi-member LLC. Each founding member chipped in $500 to cover legal fees, site assessments, and early costs. We hired a lawyer familiar with cooperative structures; the retainer ran $3,000, split among the initial members. The LLC signed a 25-year lease with the community center, paying $1,200 annually for roof use. Subscribers signed a straightforward agreement promising to buy their share of the array’s production credits at a fixed rate slightly below the utility’s retail price. The discount started at 10% and has held steady. No subscriber paid an upfront fee. The LLC recouped its investment through revenue from credit sales and the NY-Sun incentive, which gave a one-time payment of $0.35 per watt installed.

Alternative: Partner with a Developer

If forming an LLC feels too heavy, reach out to solar developers active in upstate New York. Many will develop a project at no cost to your community group, earning their return through tax credits and subscriber revenue. Your role becomes outreach: convincing neighbors, churches, and small businesses to sign up. This path gives up some local control but slashes the administrative burden. Either way, transparency about money flows is non-negotiable. People need to trust the discount is real and that no one’s profiting excessively at their expense.

Close-up of hands reviewing solar contract and utility bill on a kitchen table

Navigate Incentives and Utility Interconnection

New York State has built a decent support framework for community solar, but the process still demands patience. The NY-Sun program, run by NYSERDA, provides incentives that cut the upfront cost of equipment and installation. As of 2024, the incentive for residential and small commercial projects in upstate regions runs between $0.20 and $0.40 per watt, depending on the utility territory and project details. Your installer will typically handle the incentive application, but you should understand the numbers.

Interconnection is the technical and bureaucratic step of tying your array to the local grid. You submit an application to your utility—NYSEG, National Grid, or whoever—detailing system size, location, and equipment. The utility reviews the impact on its infrastructure and may require upgrades. In our case, the existing transformer was fine, so no extra cost came up. But some projects face upgrade charges of $5,000 to $20,000. Plan for that possibility early.

The VDER Tariff and Bill Credits

Under the Value of Distributed Energy Resources tariff, the electricity your array sends to the grid gets a monetary value based on energy, capacity, environmental, and other components. Subscribers receive a credit on their utility bill proportional to their share of production. It shows up as a line-item deduction. In our experience, a typical household subscribing to a 5-kilowatt share saves between $120 and $180 a year. That might sound modest, but for a retiree on Social Security, it covers a month of groceries. The savings add up over the system’s 25- to 30-year lifespan.

Select an Installer and Oversee Construction

Get at least three quotes from installers with community solar experience. Ask for references from past community projects—not just residential rooftop jobs. Community arrays involve different metering, subscriber management software, and ongoing maintenance wrinkles. Our installer, an Ithaca-based firm, had done four similar projects and could demo their subscriber portal before we signed. The contract should spell out who handles permits, who coordinates with the utility, and what warranty covers the panels, inverters, and workmanship.

Construction itself is the shortest phase. Our 45-kilowatt rooftop system took eight working days to install. The crew mounted racking, secured 120 panels, wired the inverters, and tested the system. A town building inspector did the final electrical inspection, and the utility installed a bi-directional meter. Then we waited three weeks for the utility’s permission to operate. That stretch felt endless, but when the inverter’s display lit up and started counting the first kilowatt-hours, the whole team gathered to watch. Someone brought cider doughnuts. It felt like a barn raising for the modern age.

Manage Subscribers and Keep the Community Engaged

Flipping the switch isn’t the finish line. Subscriber management—adding new people, removing those who move, explaining bill fluctuations—takes steady attention. We use a software platform that automates credit allocation and spits out monthly statements, but a real person still answers emails when someone’s confused about a winter bill that looks higher than expected (because production dips while usage spikes). Clear, patient communication keeps trust alive.

We also run an annual “Solar Checkup” event where subscribers can see the system up close, ask questions, and hear a brief financial update. These gatherings reinforce that sense of shared ownership. They’ve also sparked interest in other local stuff: weatherization workshops, a community garden, a bulk-purchasing group for heat pumps. The solar project became a spark, proving collective action on energy is doable here, in a place that sometimes feels overlooked by state policymakers.

Lessons from the Southern Tier

If I could offer one piece of hard-won advice, it’s this: don’t overcomplicate the pitch. When we first started, I caught myself talking about kilowatt-hours, capacity factors, and renewable energy credits. Eyes glazed right over. Then I shifted to “You can save about $150 a year on your electric bill without putting panels on your roof.” That landed. People understand savings. They understand local jobs. They understand a church or fire station that gets a little extra income from hosting panels. Frame the project that way, and support grows.

Another lesson: involve your local government early, even if you don’t need a zoning change. A resolution of support from the town board carries weight with funders and can smooth the interconnection path. Our supervisor wrote a simple letter endorsing the project as consistent with the town’s comprehensive plan. That letter helped us snag a small grant from a regional community foundation to cover legal fees.

Finally, be straight about timelines. From that first potluck to the day we energized the array, 26 months passed. Much of that was eaten up by legal structuring, utility review, and contractor scheduling. The work isn’t continuous—long stretches of waiting broken by bursts of activity. Persistence matters more than expertise.

FAQ: Common Questions About Starting a Community Solar Project

Do I need to own a sunny roof to participate?

No. That’s the whole point of community solar. Subscribers don’t need to own property or have a suitable roof. You just need an electric utility account in the same service territory as the project. Renters, condo owners, homeowners with shaded roofs—all can subscribe and get credits on their existing bills.

What happens if the project produces less energy than expected?

Solar production bounces around with weather and seasons. Subscriber credits are proportional to actual output, so a cloudy year means slightly lower savings. But the financial models used by solid projects include conservative production estimates, and panels are warranted to produce at least 80% of their rated power for 25 years. In our project, actual production has stayed within 3% of projections each year.

Is there any cost to join as a subscriber?

In most community solar setups, there’s no upfront fee to subscribe. You sign an agreement, often for a year at a time, and start receiving bill credits. Some projects charge a small enrollment fee or ask for a deposit, but the typical approach in New York is no-cost enrollment. Always read the contract carefully and confirm the discount rate and any early termination terms.

How do I find others in my area who want to start a project?

Start local. Post on a town Facebook group, hang flyers at the grocery co-op, ask to speak at a Rotary Club or library event. NYSERDA also maintains a “Solarize” campaign toolkit that can help organize community outreach. Once you gather a handful of interested people, momentum tends to build naturally.

Building a community solar project in upstate New York isn’t some abstract exercise. It’s a string of small, concrete steps: a conversation over coffee, a call to a town official, a site walk in the snow, a signed lease. Each step is doable. And when the meter starts spinning backward for the first time, you feel something rare these days: the satisfaction of having built something tangible, together, that will outlast you.

Danielle Kowalski is a community organizer and solar subscriber in Binghamton, New York. She writes about local sustainability, energy affordability, and the quiet power of neighbor-to-neighbor action.

How to Start a Community Solar Project in Upstate New York: A Step-by-Step Guide

Upstate New York has the land, the people, and the sunlight to make community solar a reality. But turning a good idea into a working project takes planning, patience, and a real feel for the local landscape. This guide walks through the practical steps for building a community solar project in our region—from the first neighborhood meeting to the day the panels start producing power. It’s written for anyone who wants cleaner energy, lower bills, and a stronger local economy, without waiting for someone else to make it happen.

Solar panels on a residential rooftop in a suburban neighborhood

What Is Community Solar, and Why Does It Fit Upstate New York?

Community solar is a shared energy setup. A single, off-site solar array serves multiple participants, and subscribers get credits on their electric bills for their share of the power produced. This opens the door for renters, homeowners with shaded roofs, and small businesses that can’t install their own panels. In upstate New York, where many homes are older, tree-lined, or just not oriented for rooftop solar, community solar makes clean energy accessible to a much wider group.

The region also has strong incentives. New York State’s climate goals, combined with programs from the New York State Energy Research and Development Authority (NYSERDA), create a supportive environment. Local utilities like NYSEG and National Grid participate in community distributed generation (CDG) programs that make billing and crediting straightforward. Add in the growing interest from residents who want to keep energy dollars local, and the case for a community-led project becomes clear.

Step 1: Gather Your Core Team and Define Your Vision

Every successful community solar project starts with a small group of committed people. Look for neighbors who bring different skills: someone who understands local zoning, a person comfortable with numbers, a communicator who can rally support, and perhaps a retired engineer or electrician. Meet in a library, a church basement, or someone’s living room. Keep the early conversations focused on two questions: What do we want this project to achieve? and Who do we want to serve?

Some groups prioritize maximum savings for low-income households. Others want to power a municipal building or school. Many aim for a mix: affordable subscriptions for residents, a demonstration of local climate action, and a modest return for any local investors. Write down your shared goals. This one-page vision statement will guide decisions later and help when you approach landowners, officials, and potential subscribers.

Step 2: Understand the Local Rules and Incentives

New York’s regulatory framework can feel dense, but you don’t need to become a lawyer. Focus on a few key areas:

  • Zoning and land use: Check with your town or county planning department. Solar arrays are often allowed in agricultural or industrial zones, but each municipality has its own rules. Some require special use permits or site plan reviews.
  • Interconnection: Your local utility must approve the connection to the grid. Start a conversation early with their distributed generation team. They can explain the technical requirements and timeline.
  • NYSERDA programs: NYSERDA offers technical assistance, financing options, and incentives for community solar, especially projects that include low- to moderate-income subscribers. Their NY-Sun program is a good place to begin.
  • Tax considerations: Federal investment tax credits can cover a significant portion of installation costs. Nonprofits can partner with tax-equity investors to access these benefits. Consult a local accountant familiar with renewable energy projects.

A group of people discussing plans around a table with solar panel diagrams

Step 3: Find and Secure a Suitable Site

Upstate New York has no shortage of open land, but not every field is right for solar. Look for a site that’s relatively flat, free of wetlands and flood zones, and has good southern exposure without shading from hills or tree lines. Proximity to existing utility infrastructure—poles, substations—can dramatically reduce interconnection costs. Brownfields, capped landfills, and underutilized farmland are often excellent candidates.

Approach landowners with respect and clarity. A long-term lease (20–25 years) is typical. Explain how the land can still be used for grazing, pollinator habitat, or even certain crops planted between rows. Offer fair compensation and put everything in writing. A local real estate attorney can help draft a lease that protects both parties.

Step 4: Design the Project and Choose a Developer Partner

At this stage, many community groups decide to partner with an experienced solar developer. A good developer handles engineering, procurement, construction, and ongoing maintenance. They also navigate the utility interconnection process and manage subscriber billing. But not all developers share a community-first mindset. Interview several. Ask how they handle subscriber outreach, whether they’ve worked with local governments in upstate New York, and if they’re willing to structure the project so the community retains some ownership or long-term revenue.

If your group wants to self-develop, you’ll need deeper technical expertise. You’ll hire an engineering firm for design, a construction contractor for installation, and a subscription management service. This path gives you more control but requires significantly more time and fundraising. Either way, the design phase should produce a detailed site plan, an estimated annual production, and a clear financial model showing how savings flow to subscribers.

Step 5: Build a Subscriber Base

A community solar project only works if people sign up. Start outreach early, long before the panels are installed. Host information sessions at community centers, farmers markets, and local festivals. Create a simple website or social media page explaining the benefits: no upfront cost, guaranteed savings (typically 5–10% off electricity bills), and the satisfaction of supporting local clean energy.

Pay special attention to reaching households that are often left out of green programs. Partner with community action agencies, food pantries, and housing authorities to connect with low-income residents. NYSERDA’s Solar for All initiative provides additional incentives for projects serving these communities. Make the enrollment process as simple as possible: a short form, clear terms, and a real person available to answer questions.

Step 6: Finance the Project

Community solar projects in upstate New York typically cost between $1 million and $3 million, depending on size. Financing usually comes from a mix of sources:

  • Tax equity investors: These partners provide capital in exchange for the federal tax credits and depreciation benefits. They’re essential for most projects.
  • Local investment: Some groups raise money through community investment funds, where residents can buy shares and earn a modest return. This keeps wealth in the community but requires securities compliance.
  • Grants and incentives: NYSERDA offers block grants and performance-based incentives. Some counties and local foundations also provide seed funding for community energy projects.
  • Debt financing: Local banks and credit unions, especially those with a community development focus, may offer construction loans or long-term debt.

Work with a financial advisor who understands renewable energy. They can model different scenarios and help you choose a structure that aligns with your group’s goals—whether that means maximum subscriber savings, local ownership, or long-term revenue for a community fund.

Solar farm in a rural area with mountains in the background

Step 7: Construction and Commissioning

Once financing is secured and permits are in hand, construction begins. A typical 2–5 megawatt project takes three to six months to build. The developer or contractor will manage the day-to-day work: driving piles, mounting racking, installing panels, and connecting inverters. During this phase, keep the community informed. A construction update newsletter or a few site visits for subscribers builds trust and excitement.

After construction, the utility conducts final interconnection testing. Once approved, the system is commissioned and begins generating power. Subscribers start seeing credits on their bills within one or two billing cycles. This is the moment to celebrate—a ribbon-cutting with local officials, a potluck for subscribers, and a press release to the local paper. The project is now a tangible part of the community’s energy future.

Step 8: Long-Term Operations and Community Engagement

A solar array is a 25-year asset. Ongoing maintenance is minimal—mostly monitoring performance, mowing vegetation, and occasional panel cleaning—but it must be budgeted and managed. If you partnered with a developer, they typically handle this. If the community owns the array, you’ll need a service contract or a trained local team.

Keep subscribers engaged over the long term. Send annual updates on production and savings. Offer opportunities for new residents to join as spots open up. Consider using a portion of project revenue to fund local sustainability initiatives: a community garden, energy efficiency workshops, or a scholarship for students pursuing clean energy careers. This turns a solar project into a lasting community asset.

Real Stories from Upstate New York

Several community solar projects already operate in the region, offering lessons and inspiration. In Tompkins County, a project on a former landfill now provides power to over 100 households, including many low-income subscribers through a partnership with a local nonprofit. In the Finger Lakes, a farmer leased a portion of his land for a solar array that coexists with a sheep grazing operation—keeping the field productive and the panels clear of weeds. These examples show that community solar can take many forms, each tailored to local needs and opportunities.

One subscriber from a project near Binghamton shared her experience: “I rent an apartment and never thought I could go solar. Now I save about $10 a month, which isn’t huge, but it adds up. And I feel good knowing the power comes from a field just a few miles away instead of a power plant somewhere else.” Stories like hers are the real measure of success.

Common Challenges and How to Address Them

No project goes perfectly. Here are a few hurdles that often arise in upstate New York and practical ways to handle them:

  • Interconnection delays: Utility timelines can stretch. Build a relationship with your utility representative early. Ask for a clear schedule and follow up regularly. Some groups hire a consultant who specializes in utility interconnection to advocate on their behalf.
  • Subscriber fatigue: People may be interested but slow to sign up. Simplify the enrollment process. Offer a referral incentive—a small bill credit for subscribers who bring in a neighbor. Keep showing up at community events.
  • Financing gaps: If traditional financing falls short, look into community development financial institutions (CDFIs) or green banks. New York Green Bank has supported several community solar projects in the state.
  • Local opposition: Some residents worry about aesthetics or land use. Address concerns directly. Share photos of well-designed solar farms with vegetative screening. Emphasize the local economic benefits and the option for dual land use like pollinator habitat.

Frequently Asked Questions

Do I need to own my home to join a community solar project?

No. Community solar is designed for renters, condo owners, and anyone with an electric bill. As long as you’re a utility customer in the project’s service area, you can subscribe and receive credits on your existing bill.

How much can I expect to save on my electric bill?

Most community solar projects in New York offer a 5–10% discount on the value of the solar credits applied to your bill. Actual savings depend on your electricity usage and the project’s specific terms, but the discount is guaranteed in the subscription agreement.

What happens if I move to a different home within the same utility territory?

You can usually transfer your subscription to your new address, as long as it remains within the same utility’s service area and the project has capacity. If you move outside the area, you can cancel your subscription without penalty—just give the required notice, typically 30–60 days.

How long does it take from the first meeting to producing power?

For a community-led project, expect 2–4 years. Securing a site, permits, financing, and subscribers takes time. Working with an experienced developer can shorten the timeline, but community engagement and careful planning are worth the investment.

Taking the First Step

Building a community solar project in upstate New York is a long but rewarding journey. It starts with a conversation. Call a neighbor. Reserve a room at the library. Put up a flyer at the co-op. The need for affordable, local clean energy is real, and the tools to create it are within reach. With the right mix of persistence, partnership, and practical know-how, your community can turn a sunny field into a source of savings, resilience, and pride for decades to come.

How Our Town Built a Community Solar Project (and How Yours Can, Too)

It started with a throwaway comment after a town board meeting. Someone muttered, “We’ve got all this empty land and sky-high electric bills—why can’t we do something with it?” That grumble turned into a conversation, and that conversation turned into a 1.2-megawatt solar array on an old gravel pit, owned by the people it serves. I’m Danielle, and I was one of the volunteers who helped make it happen in the Southern Tier. It took years, not months. It took patience, a few heated arguments, and a lot of coffee. But if you’ve ever looked at a sunny hillside in your town and thought, “We could do something good here,” I’m here to tell you: you can. Here’s how we did it, and how you might start yours.

Community members discussing plans over a blueprint in a sunlit room

Why Community Solar Fits Upstate New York

Upstate winters are long, heating bills are brutal, and a lot of our towns are dotted with old factory sites and empty lots. That’s the bad news. The good news? We’ve got space—and plenty of it. Unlike a crowded city where every square foot is contested, we can look at a capped landfill or a south-facing field and see a power plant that doesn’t smoke, hum, or demand a new gas pipeline. Community solar takes that space and turns it into a shared asset. Renters, condo owners, folks with shady roofs—they can all buy in and get credits on their electric bills. It’s a way to make clean energy something that actually shows up in your mailbox as savings, not just a headline.

In New York, the policy side helps. NY-Sun and NYSERDA have put real money and technical support behind these projects. The state wants 10 gigawatts of distributed solar by 2030, and community solar is a big piece of that. But policy only sets the table. The meal gets cooked by people in their own towns, figuring out what works for them.

Step 1: Gather Your People and Get Clear on the “Why”

We didn’t start with a business plan. We started with a handful of neighbors in a library meeting room, all of us tired of watching electricity rates climb. Our steering committee was a mixed bag: a retired science teacher, a dairy farmer, an electrician, a couple of retirees who knew how to read a budget, and me. You don’t need experts on day one. You need people who’ll show up every other week and do the homework.

Early on, we hammered out our purpose. Were we just chasing cheaper bills? Trying to clean up a local brownfield? Making a statement about local control? For us, the anchor was lowering energy costs for low-income families while proving a small town could own its power generation. That clarity saved us from a dozen dead-end arguments later. Write it down. Put it on the wall. When things get tangled—and they will—it pulls you back to center.

Step 2: Get Your Head Around the Model

Here’s the basic mechanics: a solar array gets built somewhere in your utility’s territory. The electricity flows into the grid, not directly to your house. Subscribers—people and small businesses—get credits on their monthly bills for their share of the power produced. The project itself sits inside a legal entity. We picked a cooperative because it matched our values: one member, one vote, and profits rolled back into the community or returned as savings. An LLC or a nonprofit can work too, but the co-op felt right for us.

There are on-site setups (panels on an apartment building) and off-site ones (panels on a gravel pit a mile away). Ours is off-site. The rule you can’t ignore: subscribers have to be in the same utility load zone. For us, that meant NYSEG territory. Call your utility early and ask about their community distributed generation (CDG) rules. Some utilities are easier to work with than others, and you’ll want to know what you’re walking into.

Step 3: Kick the Tires on Sites and Resources

We spent months driving around with a town assessor’s map and a handheld compass, squinting at slopes and looking for power lines. You need a spot with good southern exposure, minimal shade, and access to three-phase power. Flat or gently sloping land saves money on mounting structures. Soil matters too—ours was gravelly, which actually made for easy racking, but wet clay can drive up costs.

We scraped together $5,000 for a feasibility study from a local engineering firm. That money came from bake sales, small donations, and a grant from our regional economic development council. The study told us the gravel pit would work and gave us numbers we could take to lenders. Don’t skip zoning. Our town had a solar ordinance with height limits and setback rules. We needed a special permit, and that meant four months of planning board meetings. We held open houses with coffee and cookies, answered every question about glare and property values, and promised a decommissioning fund. Being boringly transparent built the trust that got us the votes.

Solar panels installed on a grassy field under a clear blue sky

Step 4: Piece Together the Money

This is the part that makes people’s eyes glaze over, but stick with me. NYSERDA’s NY-Sun program covered about 30% of our upfront costs through a grant. The federal Investment Tax Credit was another big chunk—26% at the time. But here’s the catch: a co-op can’t use a tax credit directly because it’s not a for-profit. We brought in a tax equity investor, which is a fancy way of saying a partner who could use the credit and pass the benefit back to us in lower project costs.

We layered a low-interest loan from a green bank on top of the grant, and each subscriber paid a one-time $200 membership fee. That fee bought them a share in the co-op and a slice of the bill credits. We also ran a local crowdfunding campaign that pulled in $15,000 from people who just liked the idea—neighbors who couldn’t subscribe but wanted to chip in. That community money was the thing that made the bank say yes. It showed we weren’t just a spreadsheet; we were a roomful of people with skin in the game.

Step 5: Design, Permits, and the Utility Tango

Once we had the site and the funding roughed out, we hired a solar developer. This isn’t the place to save money with a do-it-yourself approach. You need professional engineers to design the array, meet electrical codes, and file the interconnection application. The utility’s interconnection study took six months. They check whether the local grid can handle the power you’ll push into it. There’s a lot of waiting, a lot of paperwork, and a few moments where you wonder if anyone is actually reading your emails. Patience isn’t optional.

We also needed a building permit and a special use permit because the gravel pit was zoned residential. The town board wanted a decommissioning plan: what happens to the panels after 25 years? We set aside a small percentage of revenue each year into a dedicated fund. That answer—specific, funded, and boring—was exactly what they needed to hear.

Step 6: Construction and That First Flip of the Switch

Watching the racks go in and the panels get bolted down was the payoff for three years of meetings. We used a local contractor, which kept dollars in town and gave us a crew that knew how to work around mud season. Building 1.2 megawatts—about 3,000 panels—took eight weeks, plus a few weather delays. Upstate spring can be soggy, so build in a buffer.

After the utility’s final inspection and a new meter, we flipped the switch. No fanfare, just a quiet click and a hum from the inverters. Commissioning also meant setting up subscriber management software to track production and handle billing credits. We pay a third-party service a small monthly fee per subscriber. It’s not glamorous, but it keeps the lights on and the math straight.

A group of people standing proudly in front of newly installed solar panels

Step 7: Signing Up Subscribers and Keeping Things Running

We started our enrollment push six months before the array went live. We set up a folding table at the farmers market, gave talks at the senior center, and stuffed flyers into every mailbox in town. Our goal was 150 subscribers, and we hit it two months early. The pitch was simple: no credit check, no long-term contract, and about 10% off your electric bill. We reserved 40% of the capacity for low-income households—families on HEAP or other assistance programs. That wasn’t just a nice thing to do; it was baked into our mission from day one.

Now the co-op board meets monthly. We review production numbers, handle subscriber moves and cancellations, and plan maintenance. We’ve swapped out a couple of inverters and dealt with some unexpected shade from a neighbor’s new barn. The system runs within 5% of our projections. Subscribers are happy, and we’re already eyeing a second site.

What We’d Tell Our Younger Selves

If I could go back to that first library meeting, I’d whisper a few things. Get local government on your side early. Town supervisors, planning board members, county officials—they can smooth the road or throw up roadblocks. We invited them to our meetings, asked for advice, and treated them like partners. It paid off. Respect the clock. From that first conversation to commissioning took three and a half years. It’s a marathon, and burnout is real. Find a champion. We had a retired engineer who treated the project like his new full-time job, putting in 10–15 hours a week. Without him, we’d still be in the permitting phase.

And be straight about costs. Our total was $2.2 million. That number can knock the wind out of you, but incentives and financing brought our out-of-pocket cash need to around $300,000, raised over time. Legal fees alone hit $25,000. You need a lawyer who knows cooperatives, securities law (membership shares can count as securities), and real estate. It’s not a place to cut corners.

Questions We Get All the Time

Can renters really join?

Yes, and that’s half the point. If you have an electric account in the same utility zone as the project, you can subscribe. No roof, no landlord permission, no installation. If you move within the same utility territory, you can often transfer your subscription. If you move out of the area, you cancel. Simple as that.

What if the panels don’t produce as much as we hoped?

Credits follow actual production, so a cloudy year means lower credits. We built our projections conservatively and added a buffer. Most community solar deals guarantee a discount off your bill, so even in a lousy month, you still save something. Read the subscription agreement carefully—the details matter.

How do we find a good site?

Start with publicly owned land. Towns, counties, schools, and water authorities often have parcels sitting idle. Brownfields and capped landfills are great because they’re already disturbed and nobody’s fighting to build condos there. Private landowners might lease land for steady income. You need at least a few acres, good sun, and three-phase power nearby. An engineering firm or solar developer can help you evaluate what you’ve got.

Is community solar actually cheaper?

For subscribers, yes—most projects offer a 5–10% discount on the standard utility rate. The savings come from building at scale and from incentives that lower the project’s overall cost. For the wider community, there are quieter benefits: local construction jobs, lease payments to landowners, and energy dollars that stay in town instead of flowing to some distant utility headquarters.

Building a community solar project is a heavy lift. But it’s also the most grounded, hopeful work I’ve ever done. It’s not really about the panels. It’s about a bunch of neighbors deciding they’re not stuck with whatever the utility hands them. If you’re even a little curious, start talking to people. You’ll find more readiness than you expect.

Danielle Kowalski is a community organizer and cooperative board member in Broome County. She believes local action is the quiet engine of sustainability.

How to Start a Community Solar Project in Upstate New York: A Step-by-Step Guide

When I first started poking around the idea of solar for our town, I figured it would be easy—find a sunny field, get a few neighbors on board, done. I was wrong. Building a community solar project in upstate New York is a strange mix of engineering, grassroots organizing, and wrestling with state paperwork. But the path is more straightforward than it used to be, and the payoff—lower electric bills, local jobs, and a real stake in clean energy—is something towns, villages, and rural co-ops can grab hold of.

This guide comes from my own boots-on-the-ground experience working with local officials, farmers, and regular folks in the Southern Tier. It’s not a shiny brochure. It’s a real-world walk through the steps, the forms, and the people you’ll need to make a shared solar array happen.

Solar panels in a green field under a partly cloudy sky

What Exactly Is a Community Solar Project?

Community solar lets a bunch of households, businesses, or municipal accounts share the output of one big solar installation. Instead of bolting panels onto your own roof—which might be too shady, rented, or just plain wrong for solar—you subscribe to a slice of a larger, off-site array. Every month, you get credits on your electric bill for the energy your slice produces. In upstate New York, this model has caught fire because it opens solar savings to renters, low-income families, and anyone with a roof that faces the wrong way or sits under a giant maple.

The array itself is usually ground-mounted on a few acres. Subscribers sign contracts with the project developer or a third-party manager. The utility—think NYSEG or National Grid—handles the billing credits through net metering or, more often now, the Value of Distributed Energy Resources (VDER) tariff. The bottom line: people save money, the community gets a little more resilient, and the region moves closer to its clean energy targets.

Why Upstate New York Is Ready for Local Solar

Our corner of the world has a particular set of advantages. We’ve got open land, decent sun even through the gray winters, and a population that likes the idea of self-reliance. State policy has our back, too. The Climate Leadership and Community Protection Act requires 70% renewable electricity by 2030. NY-Sun, the state’s solar push, offers incentives that make community solar pencil out. And programs like Solar for All steer benefits to households that need them most.

But there’s more than policy at play. In towns from Binghamton to Ithaca, folks want energy solutions they can point to and walk past—not some distant wind farm or abstract grid upgrade. A community solar project on a reclaimed brownfield or a farmer’s scraggly pasture turns into a local landmark. It says: we built this, together.

Step 1: Gauge Interest and Form a Core Team

Don’t start by looking at land or calling installers. Start by finding your people. Gather a small crew of committed residents—maybe from a neighborhood group, a church, or the local environmental club. Hold a no-pressure meeting at the library or a community center. Bring a simple slideshow: what community solar is, how the savings work, and what a rough timeline looks like.

From that meeting, pull together three to five folks willing to be the steering committee. You’ll want different strengths: someone who gets local politics, someone with a head for numbers or legal stuff, and someone who can talk to the wider public without making their eyes glaze over. This little group will carry the project for the first six to twelve months.

Then survey the wider community. A quick online form or paper flyer can ask: Would you subscribe to a local solar project if it saved you 5–10% on your electric bill? Do you own or rent? What worries you? Use the answers to shape how you talk about the project and to show possible partners that real demand is out there.

Step 2: Understand the Utility and Regulatory Landscape

Up here, most folks get their power from NYSEG, National Grid, or RG&E. Each utility has its own interconnection process and community solar billing quirks. Reach out to the utility’s community solar point person early. Ask about hosting capacity maps—they show where the grid can handle new generation without expensive upgrades.

You’ll also need to wrap your head around the state’s VDER tariff. Under VDER, subscribers get credits based on the value of the electricity their share produces, not simply the retail rate. The credits include pieces for energy, capacity, environmental value, and where the project sits on the grid. It sounds like alphabet soup, but a solid developer partner will model the dollars and cents for you.

And don’t skip local zoning. Many upstate towns still have no specific solar ordinance. Talk to your planning board early. They might need to adopt a solar law or tweak existing codes. Be ready to address worries about glare, setbacks, screening, and what happens when the panels come down decades later. A well-thought-out project on the right site usually brings people around.

Wind turbines and solar panels side by side in a rural landscape

Step 3: Find the Right Site

Site choice can make you or break you. Look for parcels that are flat or gently slope south, free of wetlands and heavy tree cover, and close to three-phase power lines. Brownfields, closed landfills, and old gravel pits are fantastic candidates—they rarely have competing uses and can snag extra incentives.

In our region, farmland is everywhere but touchy. If you’re eyeing agricultural land, stick to marginal acres or think about dual-use agrivoltaics, where sheep graze or shade-tolerant crops grow under raised panels. Talk straight with the local farming community. Some farmers welcome the steady lease check; others worry about losing good soil. An honest chat can lead to clever compromises.

Lock down site control with an option to lease or buy. That buys you time for due diligence—environmental assessments, geotechnical studies, a full interconnection review—without betting the farm upfront.

Step 4: Choose a Developer or Go It Alone

Most community-led groups end up partnering with an experienced solar developer. The developer handles engineering, permits, financing, construction, and subscriber management. Your job shifts to community bridge-builder and subscriber recruiter, which is exactly where local trust pays off.

When you’re checking out developers, ask for references from other community projects. Look for a track record in New York State, because our regulatory maze is its own beast. A decent developer will offer a fair subscriber discount—usually 5–10% off the standard utility rate—and will be upfront about how the project makes its money.

Some communities go the self-build route, forming an LLC or cooperative. This gives you more control and maybe higher returns, but it demands serious expertise and capital. If you take this path, dig into NY-Sun incentives, federal Investment Tax Credits, and USDA Rural Energy for America Program (REAP) grants. You’ll also need a sharp legal and financial team in your corner.

Step 5: Navigate Permitting and Interconnection

Permitting in upstate New York is generally manageable for projects under 5 megawatts, which covers most community solar arrays. You’ll need site plan approval from the local planning board, a building permit, and maybe a special use permit if the zoning code doesn’t spell out solar. Start talking to the planning department early. Show up with a clean, professional site plan and be ready to discuss drainage, how it looks from the road, and the hum from inverters.

Interconnection—getting your array hooked to the grid—can eat up the most time. File your interconnection application as soon as you have site control and a rough system design. The utility will study the impact on the local grid and might require upgrades. Budget for those costs and pad your schedule.

Environmental review is usually light for solar on already-disturbed land. If your site touches wetlands, endangered species habitat, or historic spots, expect a closer look. The New York State Department of Environmental Conservation (DEC) and State Historic Preservation Office (SHPO) are the ones to call.

Step 6: Recruit Subscribers and Build Community Buy-In

Subscriber recruitment is where knowing your neighbors shines. You know the churches, the corner stores, the school district. You know who groans at high electric bills and who wants to do right by the planet. Start with anchor subscribers—a town hall, a school, a big local employer—who can commit to a solid chunk of the project’s capacity. Their name on the list gives confidence to smaller subscribers and to the money people.

Hold info sessions in places people already go: the fire hall, the farmers’ market, the senior center. Bring sample bills and walk through exactly how the credits show up. Tackle the big fears: “Will I lose power if the solar array goes down?” (No, you stay connected to the grid.) “What if I move?” (Most contracts let you transfer your subscription within the same utility area or cancel with notice.) “Where’s the catch?” (No upfront cost for most subscriptions, and the discount is locked in.)

Make sure low-income households aren’t left out. New York’s Solar for All program offers no-cost subscriptions to income-qualified families. Team up with local social service agencies to get the word out. A project that serves everyone is stronger and earns real community pride.

Step 7: Construction and Ongoing Operations

With permits in hand, financing closed, and subscribers signed, construction kicks off. A typical 2–3 megawatt project takes three to six months to build. Brace for some truck traffic, dust, and noise during grading and pile-driving. Keep neighbors in the loop with a construction timeline and a phone number for complaints.

After commissioning, the array settles into its operational life. Panels need little fuss—mostly keeping weeds down and checking inverters now and then. Snow usually slides right off tilted panels, and our cold upstate winters actually help efficiency. A solid operations and maintenance (O&M) plan keeps the project humming for 25 years or more.

Subscriber management never really stops. People move, businesses shutter, new families arrive. A responsive subscriber portal and a local voice on the phone keep the project fully subscribed and the community feeling connected.

A community meeting with residents discussing a solar project

Real Stories from Upstate New York

In the town of Caroline, near Ithaca, a group of residents sparked a community solar campaign that led to a 1.8-megawatt array on an old gravel pit. The project now feeds discounted electricity to over 200 households and the town hall. Organizer Sarah Johnson told me, “We started with five people in a living room. None of us were engineers. We just asked a ton of questions and refused to quit.”

Further west, in Genesee County, a dairy farmer leased five acres of scrubby pasture for a community solar project. The lease payments steadied the farm’s income during a brutal stretch of low milk prices. The project also set up a subscription program that put local residents first, keeping the economic lift close to home.

These stories run on a common thread: a small bunch of determined people who walked the same steps laid out here. They ran into skepticism, paperwork, and hold-ups. They also built something that lasts.

Funding and Incentives You Should Know

New York State has several programs that can push a project from “maybe” to “let’s go.” The NY-Sun Megawatt Block incentive pays per watt for eligible community solar projects. The incentive shrinks as more solar gets built in each utility territory, so timing counts. Check the current block status on the NY-Sun website.

Federal tax credits are just as big. The Investment Tax Credit (ITC) covers 30% of eligible project costs if construction starts before 2033. For projects in energy communities—places with brownfields, former coal sites, or high fossil fuel employment—a bonus credit of up to 10% might kick in. A lot of upstate communities qualify, including parts of Broome, Chemung, and Niagara counties.

For municipally owned projects, the Inflation Reduction Act brought in direct pay. Tax-exempt bodies like towns and school districts can now get the ITC as a cash refund instead of a tax credit, wiping away a big barrier to public ownership.

Low-income adder programs through NY-Sun toss in extra incentives for projects serving disadvantaged communities. If your project area lands on the state’s Disadvantaged Community map under the Climate Justice Working Group criteria, you may unlock more funding and technical help.

Common Pitfalls and How to Avoid Them

Even careful projects hit bumps. Here are the ones I run into most often in upstate New York:

Underestimating interconnection costs. A utility study might reveal the nearest substation needs a $200,000 upgrade. Always sock away a contingency fund and explore sharing costs with other developers who’d benefit from the same upgrade.

Ignoring community pushback early. A loud few can stall or sink a project. Talk to neighbors before the public hearing. Hear their worries—even the ones that seem off-base—and tweak your design where you can. A row of evergreens can turn a critic into a subscriber.

Overpromising savings. Solar savings shift with utility rates, subscription discounts, and how a household uses power. Keep your estimates conservative. It feels a lot better to surprise people with extra savings than to let them down.

Neglecting the subscriber experience. If signing up is a headache or the bill credits look like gibberish, people will walk. Put real effort into clear communication and a straightforward enrollment process.

FAQ: Your Community Solar Questions Answered

Do I need to own my home to join a community solar project?

No. Community solar was built for renters, condo owners, and anyone who can’t or doesn’t want to put panels on their roof. As long as you have an electric utility account in the same service territory as the project, you can subscribe. If you move, most contracts let you transfer your subscription to a new address within the same utility zone or cancel with a heads-up.

What happens to the solar array at the end of its life?

A responsible project includes a decommissioning plan from day one. At the end of the array’s useful life—usually 25 to 30 years—the developer must pull out all the equipment and return the land to its original shape. This plan is typically backed by a bond or letter of credit filed with the local municipality, so the community is covered even if the developer goes belly-up.

How does community solar affect local taxes?

Solar projects in New York face property taxes unless the local municipality works out a Payment in Lieu of Taxes (PILOT) agreement. A PILOT delivers predictable yearly revenue to the town, school district, and county, often landing higher than the land’s old agricultural assessment. The project also creates short-term construction jobs and may boost local businesses during development. The overall fiscal picture is usually a net positive for the host community.

Can a community solar project power my home directly during a blackout?

No. Community solar projects feed the wider utility grid, not individual homes. In a blackout, the array shuts down for safety, same as rooftop solar without a battery. Your house will still go dark unless you have a backup generator or battery storage. That said, some communities are exploring solar-plus-storage microgrids that can keep critical spots like fire stations and shelters lit up.

Looking Ahead: The Future of Community Solar in Our Region

The next few years will crack open new doors. New York is expanding its community solar program to allow projects up to 5 megawatts, up from the old 2-megawatt cap. The state is also testing community solar paired with battery storage, which could offer grid services and local backup. And as electric vehicles multiply, community solar could feed public charging stations, stitching together a full local energy loop.

For towns and neighborhoods ready to take that first step, the tools are waiting. NYSERDA gives free technical assistance through its Clean Energy Communities program. Groups like the New York Solar Energy Industries Association offer guides and connections to vetted developers. And neighboring communities that have already built projects are often happy to share what they learned the hard way.

Building a community solar project isn’t a sprint. It asks for patience, stubbornness, and a willingness to learn as you go. But when you throw that switch and watch the meter spin backward for the first time—or when a neighbor tells you they can finally afford to run their air conditioner in July—you’ll know every meeting, every form, and every hard conversation was worth it. That’s the power of doing it together, right here in upstate New York.